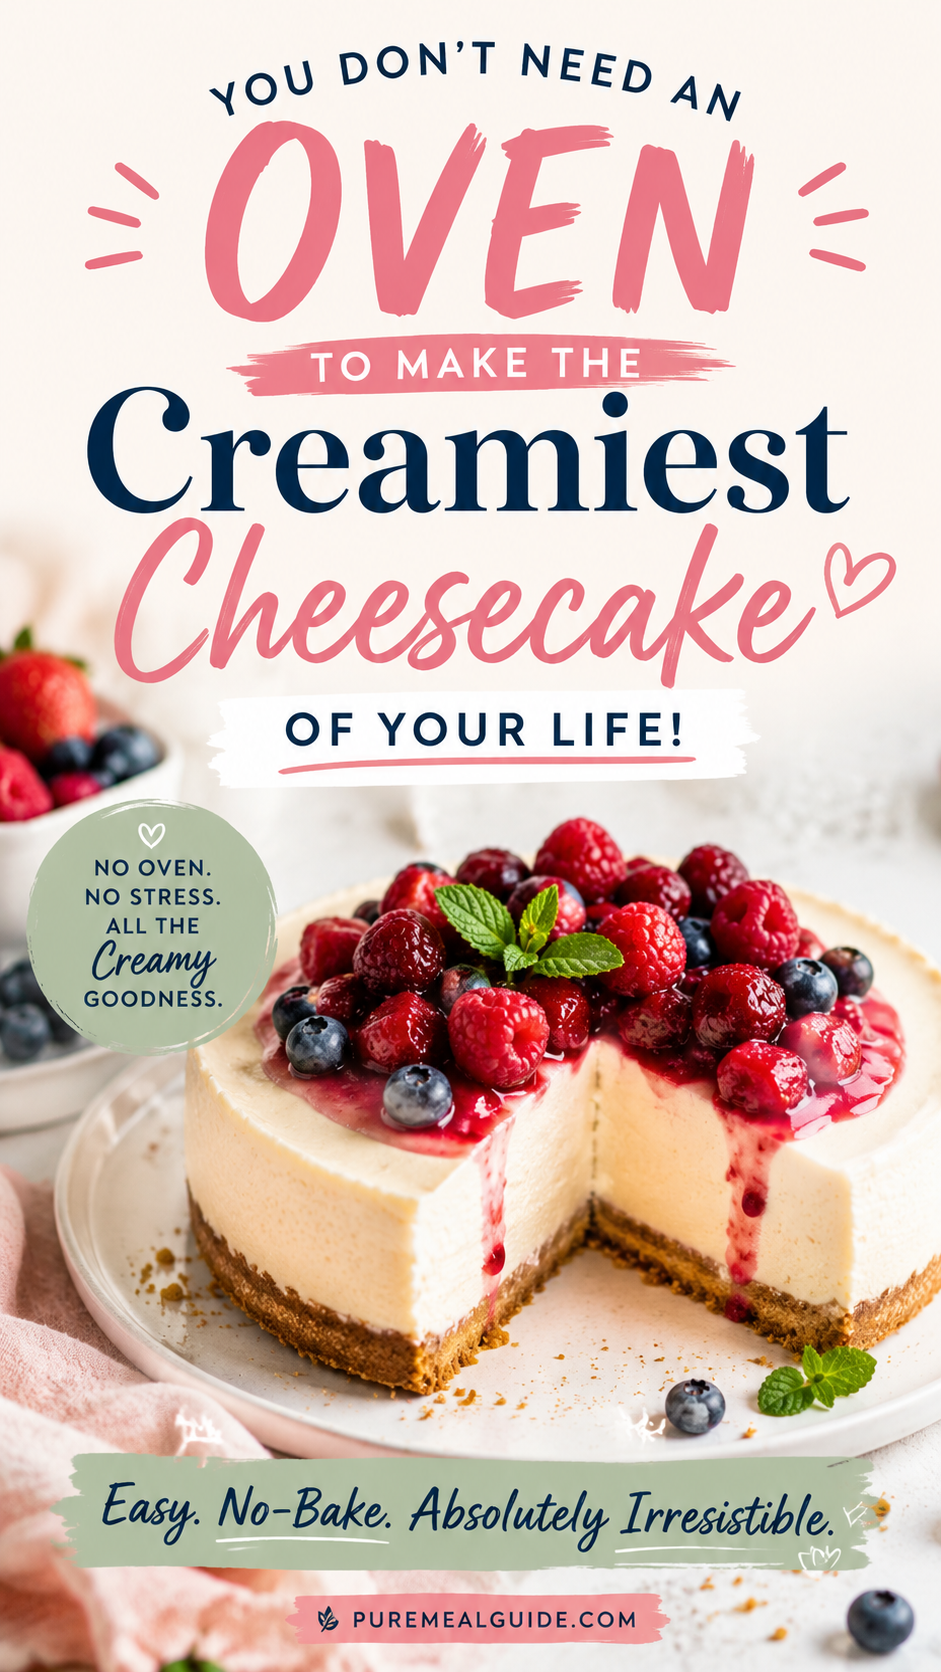
You read that right. No oven. No water bath. No cracked tops. No sweating over whether the center “jiggles just right.”
A no-bake cheesecake delivers everything you love about a classic cheesecake, but without any of the drama. And honestly? It’s even better than the baked version in a lot of ways.
The texture is silkier. The prep takes under 20 minutes. And you can make it the night before and just… go to bed. Dinner party dessert, sorted 😌
Stick around because I’m sharing a foolproof recipe plus a pro tip in the filling section that most people skip — and it’s the difference between a cheesecake that holds its shape and one that slides off the plate.
Recipe at a Glance
| Detail | Info |
|---|---|
| Prep Time | 20 minutes |
| Chill Time | 6 hours (or overnight) |
| Total Time | ~6 hours 20 minutes |
| Servings | 10-12 slices |
| Difficulty | Easy |
| Equipment Needed | 9-inch springform pan, electric hand mixer |
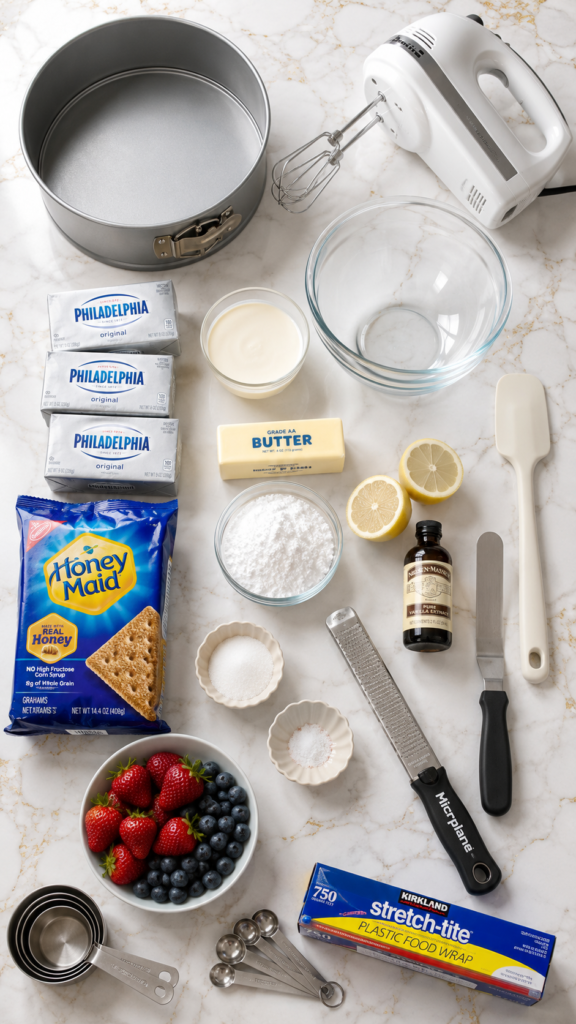
What You’ll Need
For the Crust
- 200g (about 2 cups) graham crackers (or digestive biscuits), finely crushed
- 90g (6 tablespoons) unsalted butter, melted
- 2 tablespoons granulated sugar
- Pinch of salt
For the Cheesecake Filling
- 680g (24 oz / 3 blocks) full-fat cream cheese, softened to room temperature
- 240ml (1 cup) heavy whipping cream, cold
- 120g (1 cup) powdered sugar, sifted
- 2 teaspoons pure vanilla extract
- 2 tablespoons fresh lemon juice
- 1 teaspoon lemon zest (optional but worth it)
For the Topping (Optional)
- Fresh strawberries, blueberries, or raspberries
- Strawberry jam or fruit compote for a glossy finish
Tools You’ll Need
- 9-inch springform pan
- Electric hand mixer or stand mixer
- Two mixing bowls (one large, one medium)
- Rubber spatula
- Measuring cups and spoons
- Zester or fine grater
- Offset spatula or the back of a spoon
- Plastic wrap
Pro Tips
1. Room temperature cream cheese is non-negotiable. Cold cream cheese will leave lumps in your filling no matter how long you beat it. Pull it out of the fridge at least an hour before you start.
2. Chill your bowl before whipping cream. Pop your mixing bowl in the freezer for 10 minutes before whipping. Cold equipment helps heavy cream whip faster and hold its peaks longer.
3. Don’t rush the chill time. Six hours is the bare minimum. If you try to slice it at four hours, it’ll be too soft to hold its shape. Overnight chilling gives you picture-perfect slices.
4. Sift your powdered sugar. Lumpy powdered sugar goes directly into a lumpy filling. Sift it every single time. Takes 30 seconds. Worth it.
5. Press the crust hard. This is the most underrated step. A crust that isn’t pressed firmly enough will fall apart the second you cut into it. Press until it feels solid.
How to Make No-Bake Cheesecake
Step 1: Make the Crust
Crush your graham crackers into fine crumbs. You can do this in a food processor or the old-fashioned way, by putting them in a zip-lock bag and rolling over them with a rolling pin.
Mix the crumbs with melted butter, sugar, and a pinch of salt until the texture looks like wet sand. It should clump when you press it between your fingers.
Press the mixture firmly into the bottom of your springform pan and about 1 inch up the sides. Use the flat bottom of a glass to really pack it in tight. This step matters — a loose crust will crumble when you slice.
Pop the crust in the fridge while you make the filling.
Step 2: Whip the Heavy Cream
Pour your cold heavy cream into a chilled mixing bowl. Beat it with your electric mixer on medium-high until stiff peaks form — this usually takes 3 to 4 minutes.
Why does this matter? The whipped cream is what gives a no-bake cheesecake its light, mousse-like structure. Don’t skip it, and don’t under-whip it.
Set it aside in the fridge while you work on the cream cheese base.
Step 3: Make the Cream Cheese Filling
In a large bowl, beat the softened cream cheese on medium speed until completely smooth with zero lumps. This takes about 2 minutes.
Add the sifted powdered sugar and beat again until fully combined.
Mix in the vanilla extract, lemon juice, and lemon zest. The lemon here isn’t just for flavor — it adds a subtle brightness that cuts through the richness and makes the whole thing taste fresher.
Step 4: Fold and Combine
Gently fold the whipped cream into the cream cheese mixture in two additions. Use a rubber spatula and fold slowly — you’re trying to keep as much air as possible in the mixture.
This is what makes or breaks the texture. Stir too aggressively and you’ll knock out all the air. The end result should be thick, fluffy, and creamy all at once.
Step 5: Fill and Chill
Spoon the filling over your chilled crust. Use an offset spatula to smooth the top as evenly as you can.
Cover with plastic wrap (don’t let it touch the surface) and refrigerate for at least 6 hours. Overnight is ideal.
The longer it chills, the firmer and cleaner your slices will be.
Step 6: Add Toppings and Serve
When you’re ready to serve, run a thin knife around the edge of the pan before releasing the springform latch. This prevents tearing.
Top with fresh berries, a spoonful of jam, or a simple fruit compote. Slice with a clean, sharp knife and wipe it between cuts for perfect slices every time.
Substitutions and Variations
| Swap | Use Instead |
|---|---|
| Graham crackers | Digestive biscuits, Oreos, gingersnaps, vanilla wafers |
| Unsalted butter | Coconut oil (for dairy-free crust) |
| Heavy whipping cream | Full-fat coconut cream (dairy-free option) |
| Cream cheese | Vegan cream cheese for a plant-based version |
| Powdered sugar | Powdered monk fruit sweetener for lower sugar |
| Vanilla extract | Almond extract, coconut extract, or espresso powder |
Flavor variations to try:
- Chocolate: Add 3 tablespoons of cocoa powder to the filling and use an Oreo crust
- Salted caramel: Swirl in 3 tablespoons of caramel sauce before chilling
- Lemon: Double the lemon juice and add extra zest for a tangy, citrusy version
- Strawberry: Blend in 1/2 cup of fresh strawberry puree to the filling
Make-Ahead Tips
This cheesecake was practically designed to be made ahead.
- 1 day ahead: Make the entire cheesecake, cover with plastic wrap, and refrigerate
- 2-3 days ahead: The crust can be made and stored in the fridge or freezer separately
- Freeze for up to 1 month: Wrap the whole cheesecake (without toppings) tightly in plastic wrap, then in foil. Thaw overnight in the fridge before serving
Add fresh toppings right before serving so they stay vibrant and don’t get watery.
Nutritional Breakdown (Per Slice, Based on 12 Servings)
| Nutrient | Amount |
|---|---|
| Calories | ~420 kcal |
| Total Fat | 32g |
| Saturated Fat | 19g |
| Carbohydrates | 28g |
| Sugar | 20g |
| Protein | 6g |
| Sodium | 280mg |
Numbers are estimates based on standard ingredients. Using reduced-fat cream cheese or a sugar substitute will lower these figures.
Meal Pairing Suggestions
This cheesecake pairs beautifully after:
- A light pasta dinner — the richness of the cheesecake contrasts beautifully with a simple lemon or tomato-based pasta
- A summer barbecue — fresh berry topping makes it a crowd-pleasing, refreshing finish
- A dinner party appetizer spread — make it the night before and you’re completely free to enjoy your guests
Leftovers and Storage
| Storage Method | How Long |
|---|---|
| Refrigerator (covered) | Up to 5 days |
| Freezer (whole or sliced) | Up to 1 month |
| Room temperature | No more than 2 hours |
Store leftover slices in an airtight container in the fridge. If you’re freezing individual slices, place them on a parchment-lined tray to freeze solid first, then transfer to a freezer bag. This stops them sticking together.
FAQ
Can I use low-fat cream cheese?
You can, but the texture will be softer and less rich. Full-fat gives you the firmest, creamiest result. It’s a cheesecake. Commit.
Why isn’t my cheesecake setting?
The most common culprits: cream cheese wasn’t softened, the heavy cream wasn’t whipped to stiff peaks, or it didn’t chill long enough. All three of those things matter equally.
Can I use a regular cake pan instead of a springform pan?
Technically yes, but getting clean slices out is much harder. A springform pan is worth the investment if you make cheesecake more than once.
Do I need to bake the crust?
Nope. For a no-bake cheesecake, pressing the crust firmly and chilling it is enough. Baking it does make it crunchier, but it’s not required.
Can I add gelatin to help it set?
You can, but if you use full-fat ingredients and chill it long enough, gelatin isn’t necessary. This recipe holds up beautifully without it.
Can kids make this?
Absolutely. It’s one of the few desserts where younger kids can actually help at almost every stage — crushing crackers, mixing, spreading. Just handle the electric mixer yourself.
Wrapping Up
A no-bake cheesecake sounds like it should be a shortcut. But here’s the thing — it’s not a lesser version of anything. It genuinely stands on its own.
Creamy, cool, just the right amount of sweet, and sitting on a buttery, crunchy crust. What’s not to love?
Make it once and it will absolutely become your go-to dessert when you need something that looks impressive but costs you almost zero effort. That’s a rare combo.
Give this a go and drop a comment below! I’d love to hear how it turned out, what toppings you used, and any questions you ran into along the way. Your experience might help the next person reading this 😊