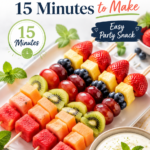
You know that moment at a 4th of July party when someone pulls out the dessert and the entire room goes quiet?
This is that dessert.
Red, white, and blue layered cheesecake that looks like it took a pastry chef three days to make — but actually comes together in a few hours with zero baking skills required.
And yes, it tastes just as good as it looks. Actually, better. 😍
Recipe at a Glance
| Detail | Info |
|---|---|
| Prep Time | 30 minutes |
| Chill Time | 6 hours (or overnight) |
| Total Time | 6.5 hours |
| Servings | 12 slices |
| Difficulty | Easy |
| No-Bake | Yes |
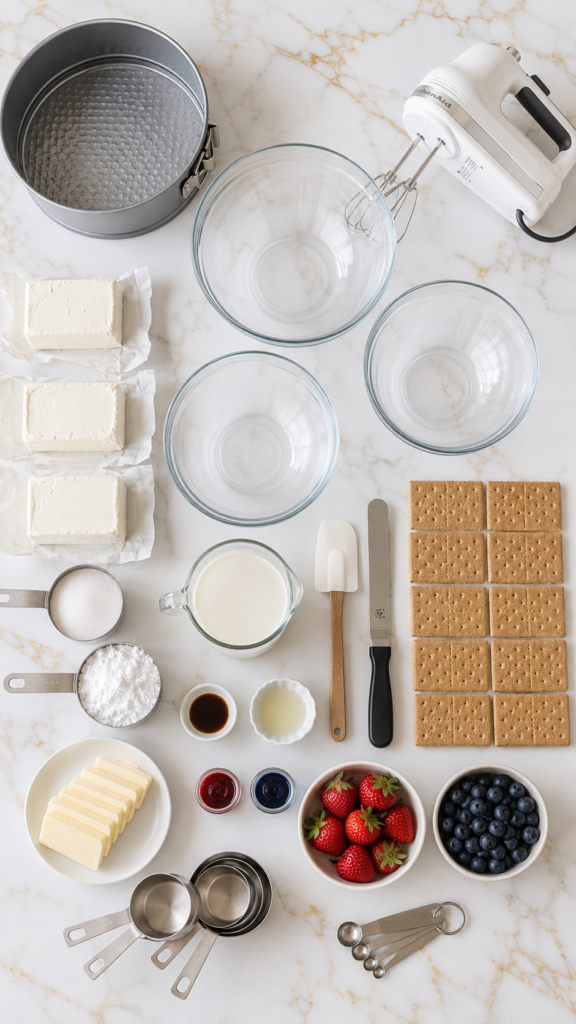
What You’ll Need
For the Crust
- 2 cups graham cracker crumbs (about 14 full crackers)
- 1/3 cup granulated sugar
- 1/2 cup (1 stick) unsalted butter, melted
For the Cheesecake Filling
- 3 blocks (8 oz each) full-fat cream cheese, softened to room temperature
- 1 cup powdered sugar
- 1 tsp pure vanilla extract
- 2 cups heavy whipping cream, cold
- 1 tbsp lemon juice
For the Layers and Toppings
- 1 cup fresh strawberries, hulled and sliced
- 1 cup fresh blueberries
- Red gel food coloring
- Blue gel food coloring
Tools You’ll Need
- 9-inch springform pan
- Stand mixer or hand mixer
- Large mixing bowls (at least 3)
- Rubber spatula
- Measuring cups and spoons
- Offset spatula
- Plastic wrap
Pro Tips
These are the things nobody tells you until you’ve already messed up once.
- Room temp cream cheese is non-negotiable. Cold cream cheese = lumpy filling. Pull it out of the fridge at least an hour before you start.
- Whip the heavy cream separately before folding it in. This is what gives the cheesecake that light, mousse-like texture instead of a dense brick. Don’t skip it.
- Gel food coloring, not liquid. Liquid food coloring adds too much water and throws off the texture. Gel gives you vivid color without messing with the consistency.
- Press the crust firmly and freeze for 10 minutes. Use the bottom of a measuring cup to pack it tight. If the crust crumbles when you slice, this step was skipped.
- Overnight chill gives you the cleanest slices. Six hours minimum, but if you can make it the night before, you’ll thank yourself at the party. 🙌
How to Make It
Step 1: Make the Crust
- Crush graham crackers into fine crumbs (a food processor works great, a zip-lock bag + rolling pin also works).
- Mix crumbs with sugar and melted butter until it resembles wet sand.
- Press evenly into the bottom of your springform pan — go about 1 inch up the sides too.
- Freeze for 10 minutes while you make the filling.
Step 2: Make the Base Cheesecake Filling
- Beat the softened cream cheese with a mixer until completely smooth, about 2 minutes.
- Add powdered sugar, vanilla extract, and lemon juice. Beat another minute.
- In a separate bowl, whip the cold heavy cream until stiff peaks form.
- Gently fold the whipped cream into the cream cheese mixture using a rubber spatula. Take your time here — you want to keep the air in.
Step 3: Create the Three Layers
Divide your filling into three equal bowls.
- Bowl 1: Leave plain (this is your white layer).
- Bowl 2: Add red gel food coloring, a few drops at a time, mixing until you hit a deep red.
- Bowl 3: Add blue gel food coloring until you hit a rich, vibrant blue.
Now layer it in the pan:
- Spread the red layer first, smoothing the top with your offset spatula.
- Add the white layer on top, spreading gently so the layers don’t blend.
- Finish with the blue layer on top.
Step 4: Chill
Cover the pan with plastic wrap and refrigerate for at least 6 hours. Overnight is better.
Step 5: Decorate and Serve
Right before serving, top with fresh sliced strawberries and blueberries in whatever pattern makes you happy.
A ring of strawberries around the edge, blueberries in the center — classic and stunning.
Carefully unclasp the springform pan, slice with a sharp knife (wipe the blade between each cut for clean slices), and serve immediately.
Substitutions and Variations
Not everyone has the exact same pantry or dietary needs. Here’s how to make it work for you:
Crust:
- Swap graham crackers for Oreos (remove the filling) for a cookies-and-cream base.
- Use gluten-free graham crackers if needed.
Filling:
- Dairy-free: Use vegan cream cheese (Violife or Kite Hill work well) and full-fat coconut cream in place of heavy whipping cream.
- Lower sugar: Swap powdered sugar for a powdered monk fruit sweetener 1:1.
Flavor twists:
- Add 1 tsp almond extract instead of vanilla for a totally different (amazing) flavor.
- Fold in 2 tbsp freeze-dried strawberry powder into the red layer for an extra punch of flavor.
Make-Ahead Tips
This cheesecake was basically made for making ahead.
- You can make it up to 3 days in advance and store it covered in the fridge.
- Add the fresh fruit just before serving so it doesn’t weep onto the white layer.
- The crust can be made a day ahead and kept in the freezer.
Nutrition Breakdown
Per slice (1 of 12), approximate values:
| Nutrient | Amount |
|---|---|
| Calories | ~420 kcal |
| Total Fat | 32g |
| Saturated Fat | 19g |
| Carbohydrates | 30g |
| Sugars | 22g |
| Protein | 5g |
These numbers are estimates and will vary based on brands used.
Leftovers and Storage
Got leftovers? Lucky you.
- Fridge: Covers well for up to 4 days. Keep it in the springform pan or transfer individual slices to an airtight container.
- Freezer: Yes, you can freeze this cheesecake (without the fresh fruit topping). Wrap individual slices in plastic wrap, then foil. Freeze up to 1 month. Thaw overnight in the fridge.
- Fruit: Always add fresh strawberries and blueberries right before serving, not before freezing or storing.
Meal Pairing Suggestions
This cheesecake pairs perfectly with:
- Grilled burgers or hot dogs — the richness of the cheesecake balances the smoky grill flavors.
- Lemonade or sparkling water — cuts through the creaminess.
- Strawberry shortcake punch — if you’re doing a whole red, white, and blue dessert table.
FAQ
Can I use a regular cake pan instead of a springform pan?
You can, but getting it out cleanly is tricky. Line the bottom and sides with parchment paper if that’s all you have.
My filling won’t set. What happened?
Most likely, the cream cheese was still cold, or the whipped cream wasn’t whipped to stiff peaks. Make sure both are at the right consistency before combining.
Can I use frozen fruit instead of fresh?
For the topping, fresh is the way to go. Frozen fruit releases water as it thaws and will make the top soggy.
Do I have to use gel food coloring?
Technically no, but the colors will be dull and the texture of your filling can be affected by liquid food coloring. Gel is worth it.
Can I make this with a baked cheesecake recipe instead?
You can, but you’d need to adjust the layering process. No-bake is much more beginner-friendly and honestly, the texture on this version is incredible.
Can kids help with this recipe?
Absolutely. The crust pressing, the color mixing, the berry topping — perfect tasks for little hands.
Wrapping Up
A show-stopping dessert that takes a few hours and zero advanced skills. That’s the whole pitch.
Make it the night before your 4th of July cookout, pull it out of the fridge right when the sparklers come out, and watch people actually lose their minds a little.
It’s one of those recipes that photographs beautifully and tastes even better than it looks — and that is a rare thing.
Give it a try and drop a comment below! Tell me how it turned out, what variations you tried, or any questions you have. I read every single one. 🎆