No oven. No fancy skills. No stress.
Just layers of ice cream, a buttery cookie crust, and a fudge situation so good you’ll want to make excuses to lick the spatula multiple times.
Ice cream cake sounds like something you’d order from Dairy Queen and call it a day. But making one at home? Completely different experience — and honestly not that hard once you know the order of things.
This one has a crunchy Oreo crust, a thick fudge layer, two flavors of ice cream, whipped cream on top, and enough wow factor that people will actually ask you for the recipe. 😏
Recipe at a Glance
| Detail | Info |
|---|---|
| Prep Time | 30 minutes |
| Freeze Time | 6+ hours (overnight preferred) |
| Servings | 10-12 slices |
| Difficulty | Easy |
| Tools Needed | Springform pan, mixer, food processor |
Wait — Can You Actually Make This at Home?
Short answer: yes, and it’s easier than you think.
The “secret” most recipes skip over is that temperature control is everything. Ice cream that’s too frozen = tears. Ice cream that’s too soft = soupy mess that refreezes unevenly.
There’s a sweet spot. And once you hit it, the whole thing comes together in under 30 minutes of actual work.
The rest is just… waiting for it to freeze. Which, honestly, is the hardest part. 😅
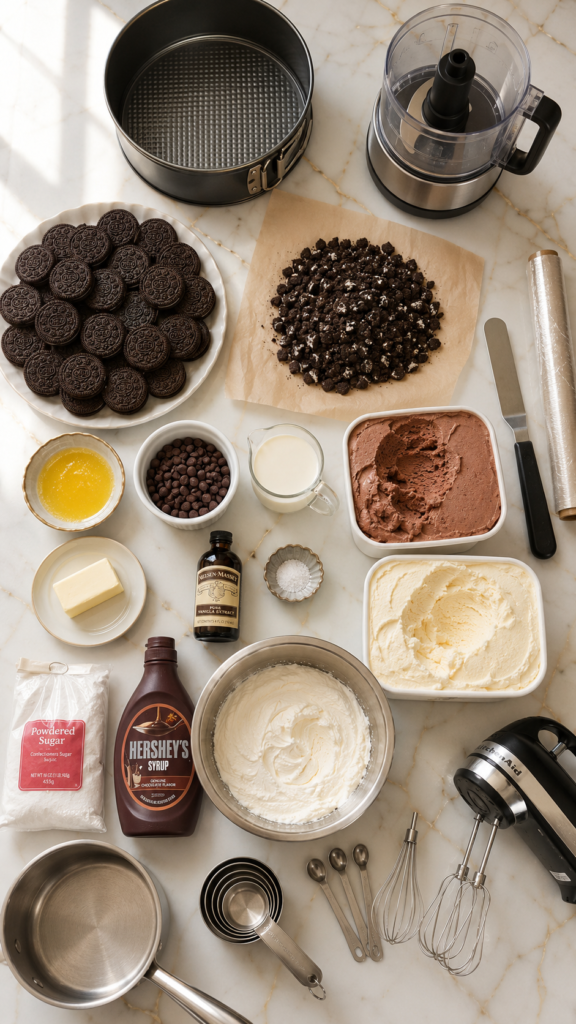
What You’ll Need
For the Crust
- 24 Oreo cookies (whole, filling included)
- 5 tablespoons unsalted butter, melted
For the Fudge Layer
- 1 cup semi-sweet chocolate chips
- ½ cup heavy cream
- 1 tablespoon unsalted butter
- 1 teaspoon vanilla extract
- Pinch of salt
For the Ice Cream Layers
- 1.5 quarts (about 6 cups) chocolate ice cream, softened
- 1.5 quarts (about 6 cups) vanilla ice cream, softened
For the Topping
- 2 cups heavy whipping cream, cold
- 3 tablespoons powdered sugar
- 1 teaspoon vanilla extract
- ¼ cup crushed Oreos
- 2 tablespoons chocolate sauce or hot fudge (for drizzle)
- Optional: chocolate shavings, sprinkles, or crushed candy bars
Tools You’ll Need
- 9-inch springform pan (non-negotiable — it makes removal so much easier)
- Food processor or zip-lock bag + rolling pin
- Medium saucepan
- Stand mixer or hand mixer with whisk attachment
- Offset spatula or back of a large spoon
- Plastic wrap
- Freezer-safe storage bag or foil
Pro Tips
These are the things I wish someone had told me the first time I made this:
- Soften your ice cream strategically. Pull it out of the freezer 10-15 minutes before you need to spread it. You want it scoopable, not melted. If it gets too soft, pop it back in the freezer for 10 minutes.
- Freeze between every layer. This is the step people rush — and then regret. Each layer needs at least 30 minutes in the freezer before you add the next one. It prevents muddy, blended layers.
- Make your fudge layer slightly ahead. The fudge needs to cool to room temperature before you pour it over the crust. Pour it on hot = soggy crust. It’s worth the 15-minute wait.
- Line your springform pan with plastic wrap before you start. Makes it dramatically easier to lift out the finished cake without destroying the edges.
- Whip your cream cold. The bowl, the beaters, the cream — all cold. Even better if you chill the mixing bowl in the freezer for 10 minutes first. Warm cream will not whip properly.
How to Make It
Step 1: Make the Crust
- Pulse the Oreos in a food processor until they’re fine crumbs. (No food processor? Put them in a zip-lock bag and crush with a rolling pin.)
- Mix the crumbs with melted butter until it looks like wet sand.
- Press firmly into the bottom of your springform pan. Use the bottom of a measuring cup to get it packed tight.
- Freeze for 20 minutes.
Step 2: Make the Fudge Layer
- Heat the heavy cream in a small saucepan over medium heat until it just starts to simmer — not boiling.
- Pour it over the chocolate chips in a bowl. Let it sit for 2 minutes, then stir until smooth.
- Add the butter, vanilla, and salt. Stir until glossy.
- Let it cool to room temperature (about 15-20 minutes).
- Pour over the frozen crust and spread evenly.
- Freeze for 30 minutes.
Step 3: Add the First Ice Cream Layer
- Scoop the softened chocolate ice cream onto the fudge layer.
- Spread with an offset spatula into an even layer.
- Cover with plastic wrap and freeze for at least 30 minutes.
Step 4: Add the Second Ice Cream Layer
- Scoop the softened vanilla ice cream over the chocolate layer.
- Smooth out the top as evenly as you can — this is your canvas for the toppings.
- Cover tightly with plastic wrap and freeze for at least 4 hours, or overnight if you can wait.
Step 5: Make the Whipped Cream & Decorate
- Beat the cold heavy cream, powdered sugar, and vanilla until stiff peaks form.
- Remove the cake from the freezer and release the springform.
- Spread or pipe the whipped cream on top.
- Sprinkle with crushed Oreos, drizzle with chocolate sauce, and add any other toppings you like.
- Freeze for 30 more minutes before slicing.
Step 6: Slice and Serve
Run a sharp knife under hot water, wipe it dry, and slice. Repeat between cuts for clean slices.
Substitutions and Variations
You can really make this your own:
| Swap | Try Instead |
|---|---|
| Oreo crust | Graham cracker crust, Nutter Butter crust, brownie base |
| Chocolate ice cream | Strawberry, coffee, mint chip, cookie dough |
| Vanilla ice cream | Caramel swirl, birthday cake, cheesecake flavor |
| Whipped cream | Cool Whip (easier, holds longer in freezer) |
| Fudge layer | Caramel sauce, peanut butter, Nutella |
| Oreo topping | Heath toffee bits, rainbow sprinkles, crushed M&Ms |
Dairy-free version: Use coconut milk ice cream and a dairy-free chocolate for the fudge layer. Coconut cream whips up nicely too.
Make-Ahead Tips
This cake is basically designed to be made ahead.
- You can make it up to 5 days in advance if you wrap it tightly.
- Do everything except the final whipped cream topping if making more than 2 days ahead — that’s best added the day of.
- If you’re making it for a party: build the cake layers the night before, then decorate the morning of.
Nutritional Information (Per Slice, 1/12 of cake)
| Nutrient | Amount |
|---|---|
| Calories | ~480 |
| Fat | 28g |
| Saturated Fat | 16g |
| Carbohydrates | 52g |
| Sugar | 38g |
| Protein | 6g |
Estimates based on standard ingredients. Will vary depending on brands and ice cream flavors used.
Meal Pairing Suggestions
Ice cream cake is obviously a dessert, but it works really well as:
- Birthday party centerpiece (obviously)
- Fourth of July dessert — go with strawberry + vanilla for red, white, and blue vibes
- Potluck showstopper — people will lose their minds when they see you walk in with this
- Summer dinner finale — serve after grilled burgers or ribs and you’ll be everyone’s favorite person
Leftovers and Storage
Here’s what you need to know:
- Store leftovers tightly wrapped in plastic wrap or foil in the freezer.
- It keeps well for up to 2 weeks, though the whipped cream topping is best within the first few days.
- To serve later: pull it out 5-10 minutes before cutting so it softens slightly.
- Don’t refrigerate — it’ll get soggy. Freezer only.
FAQ
Can I use store-bought hot fudge instead of making my own?
Absolutely. A good-quality jarred fudge works fine. Just warm it slightly so it spreads, then let it cool before adding the ice cream.
My ice cream layers melted together — what happened?
You either didn’t freeze long enough between layers, or your ice cream was too soft when you spread it. Next time, go back to the freezer if it feels too liquid.
Can I make this without a springform pan?
You can use a regular 9-inch cake pan lined with plastic wrap. Just make sure enough plastic wrap hangs over the sides so you can lift the whole cake out once it’s frozen.
How do I get clean slices?
Hot knife technique: dip a sharp knife in hot water, wipe dry, cut. Repeat for every slice. Works perfectly.
Can I use a different size pan?
Yes. An 8-inch pan makes taller layers. A 10-inch makes thinner ones. Adjust your ice cream amounts accordingly.
How far in advance can I make this?
Up to 5 days. Just wait to add the whipped cream topping until closer to serving time.
What if my whipped cream won’t whip?
Your cream was probably too warm. Make sure everything is cold, and if your kitchen is hot, put the mixing bowl in the freezer for 10 minutes first.
Wrapping Up
Here’s the thing about this ice cream cake: it looks like a lot of effort, but most of the time is just the freezer doing the work for you.
Once you make it the first time, you’ll realize how simple it actually is — and you’ll have a go-to dessert that genuinely impresses people every single time.
Give it a shot, and when you do, come back and leave a comment below. I want to hear what flavor combo you went with, how it turned out, and honestly — any questions that came up along the way. 🍦