You’ve had vanilla cake before. But have you had this vanilla cake?
The kind that’s so soft it almost melts before you even chew it. The kind where the crumb is tight and even, the flavor is deep and buttery, and the frosting tastes like it came from a bakery you’d wait in line for.
This recipe changed the way I think about “simple” desserts.
Recipe at a Glance
| Detail | Info |
|---|---|
| Prep Time | 20 minutes |
| Bake Time | 30–35 minutes |
| Cooling Time | 1 hour |
| Total Time | ~2 hours |
| Servings | 12 slices |
| Skill Level | Beginner-friendly |
| Yield | Two 9-inch round cake layers |
Why This Vanilla Cake Hits Different
Most vanilla cakes are… fine. Dry, a little bland, forgettable.
This one uses cake flour instead of all-purpose flour, which gives it that insanely tender crumb. It also uses sour cream (yes, really) which keeps every single slice moist for days. And the vanilla? We’re using pure vanilla extract and vanilla bean paste for a flavor that actually tastes like vanilla, not just sweetness.
One more thing: this cake uses the reverse creaming method for part of the mixing process. It sounds fancy, but it’s not. And it makes a massive difference in texture. More on that below.
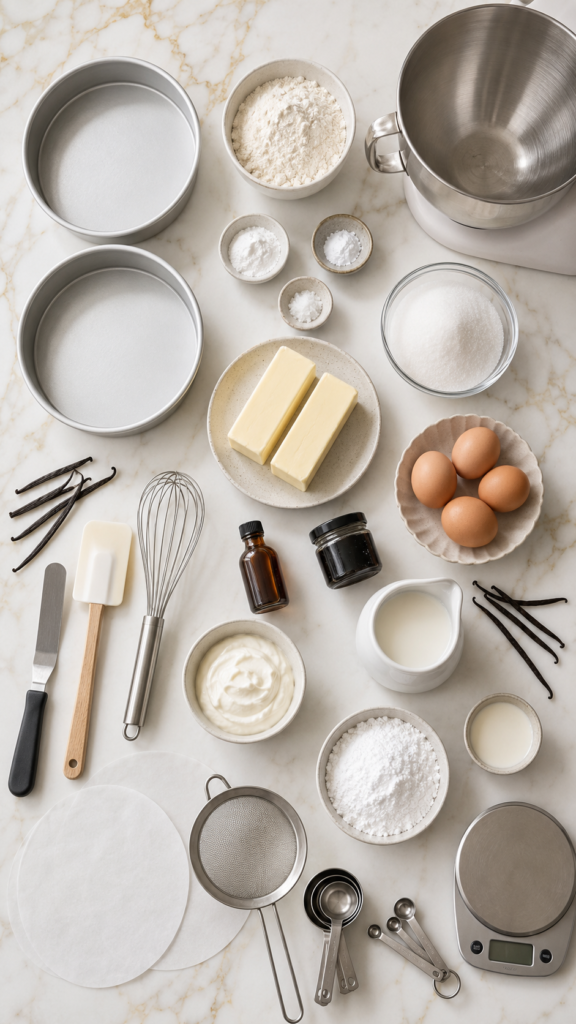
What You’ll Need
For the Cake
- 2 ½ cups (295g) cake flour
- 2 ½ tsp baking powder
- ½ tsp baking soda
- ½ tsp fine sea salt
- 1 cup (226g) unsalted butter, at room temperature
- 1 ¾ cups (350g) granulated sugar
- 4 large eggs, at room temperature
- 2 tsp pure vanilla extract
- 1 tsp vanilla bean paste
- 1 cup (240g) full-fat sour cream, at room temperature
- ½ cup (120ml) whole milk, at room temperature
For the Vanilla Buttercream
- 1 cup (226g) unsalted butter, at room temperature
- 4 cups (480g) powdered sugar, sifted
- 3–4 tbsp heavy cream
- 2 tsp pure vanilla extract
- ¼ tsp fine sea salt
Tools You’ll Need
- Two 9-inch round cake pans
- Stand mixer or hand mixer
- Large mixing bowls
- Rubber spatula
- Whisk
- Sifter or fine mesh strainer
- Measuring cups and spoons
- Kitchen scale (strongly recommended)
- Offset spatula (for frosting)
- Parchment paper
- Cooling rack
- Cake turntable (optional, but helpful)
Pro Tips
These are the things I wish someone had told me the first time I made this cake.
- Room temperature ingredients are non-negotiable. Cold butter, cold eggs, cold sour cream — they all cause the batter to curdle and bake unevenly. Pull everything out 1 to 2 hours ahead of time.
- Don’t skip the cake flour. Cake flour has less protein than all-purpose flour, which means less gluten development and a much softer, more delicate crumb. If you only have all-purpose flour, you can substitute: for every 1 cup of cake flour, use ¾ cup all-purpose flour + 2 tbsp cornstarch.
- Don’t overmix after adding the flour. Once the dry ingredients hit the wet, mix only until just combined. Overmixing activates gluten and turns your soft cake into a dense brick.
- Tap your pans on the counter before baking. A few firm taps releases air bubbles hiding in the batter. Fewer air bubbles = more even layers.
- Let the cakes cool completely before frosting. I know. It’s hard. But frosting a warm cake is a disaster waiting to happen. The buttercream will slide right off. Give it at least an hour on a wire rack.
Substitutions and Variations
| Swap | What to Use |
|---|---|
| Sour cream | Full-fat Greek yogurt (same amount) |
| Whole milk | Buttermilk (adds slight tang) |
| Butter in cake | Equal amount of good-quality margarine |
| Eggs | For each egg: ¼ cup unsweetened applesauce or a flax egg |
| Vanilla buttercream | Cream cheese frosting, ermine frosting, or Swiss meringue buttercream |
Flavor variations worth trying:
- Add 1 tsp almond extract alongside the vanilla for a nostalgic bakery flavor
- Fold in 1 cup fresh berries before baking for a fruit-filled version
- Add the zest of one lemon to the batter for a citrus lift
- Fill the layers with strawberry jam before frosting for a classic combination
Make-Ahead Tips
This cake is actually better the next day. Seriously.
- Bake the layers up to 2 days ahead. Wrap each cooled layer tightly in plastic wrap and store at room temperature.
- Make the buttercream up to 3 days ahead. Store it in an airtight container in the fridge, then let it come to room temperature and re-whip it before using.
- The fully assembled cake can be covered and refrigerated for up to 3 days. Just let it sit at room temperature for 30–45 minutes before serving so the frosting softens back up.
Nutritional Breakdown (Per Slice, approx.)
| Nutrient | Amount |
|---|---|
| Calories | ~520 kcal |
| Total Fat | 27g |
| Saturated Fat | 16g |
| Carbohydrates | 65g |
| Sugar | 48g |
| Protein | 5g |
Based on 12 servings with vanilla buttercream. Values are approximate.
Meal Pairing Suggestions
This cake pairs really well with:
- A scoop of vanilla bean or strawberry ice cream alongside a slice
- Fresh sliced strawberries or a berry compote on top
- A drizzle of salted caramel sauce over each slice before serving
- A cup of strong coffee or chai — the slight bitterness balances the sweetness perfectly
How to Make the Best Vanilla Cake
Step 1: Prep
Preheat your oven to 350°F (175°C). Grease both 9-inch cake pans, line the bottoms with parchment paper, then grease the parchment too. Set aside.
Step 2: Mix the Dry Ingredients
In a large bowl, whisk together the cake flour, baking powder, baking soda, and salt. Set aside.
Step 3: Cream Butter and Sugar
In the bowl of your stand mixer (or using a hand mixer), beat the butter and sugar on medium-high speed for about 4–5 minutes, until pale, fluffy, and noticeably increased in volume. Don’t rush this step — it’s what makes the cake light.
Step 4: Add the Eggs and Vanilla
Add the eggs one at a time, beating well after each addition. Scrape down the sides of the bowl as needed. Mix in the vanilla extract and vanilla bean paste.
Step 5: Alternate Dry and Wet
With the mixer on low, add the dry ingredients in three additions, alternating with the sour cream and milk (start and end with the dry ingredients). Mix only until just combined after each addition. Scrape the bowl and give it a final gentle fold with a spatula.
Step 6: Bake
Divide the batter evenly between the two prepared pans. Tap the pans firmly on the counter 3–4 times. Bake for 30–35 minutes, or until a toothpick inserted in the center comes out clean and the edges have just started pulling away from the pan.
Step 7: Cool
Let the cakes cool in their pans for 10 minutes, then carefully invert them onto a wire rack and let them cool completely before frosting. This will take at least 1 hour.
Step 8: Make the Buttercream
Beat the butter on medium speed for 3–4 minutes until creamy and pale. Add the sifted powdered sugar in two batches, beating on low at first, then increasing to medium-high. Add the vanilla extract, salt, and heavy cream one tablespoon at a time until you reach your desired consistency. Beat on high for 2 minutes until fluffy.
Step 9: Frost and Assemble
Place one cake layer on your serving plate or cake turntable. Add a generous layer of buttercream on top and spread it evenly with your offset spatula. Place the second layer on top. Apply a thin crumb coat all over the cake, then refrigerate for 15 minutes. Apply the final frosting layer and smooth or swirl as you like.
Leftovers and Storage
- Room temperature: Cover the cake tightly and store at room temperature for up to 2 days.
- Refrigerator: Store in an airtight container or under a cake dome in the fridge for up to 5 days. Always bring to room temperature before serving.
- Freezer: Freeze unfrosted cake layers (wrapped tightly in plastic wrap + foil) for up to 2 months. Thaw overnight in the fridge before assembling.
Pro tip: Individual slices freeze beautifully too. Wrap each piece in plastic wrap and store in a freezer-safe bag. Pull one out whenever you want a slice. 😄
FAQ
Can I make this as a sheet cake instead of layers?
Yes! Pour the batter into a greased 9×13-inch pan and bake at 350°F for about 35–40 minutes. Start checking at 30 minutes.
Can I use salted butter?
You can, but the cake may taste slightly salty. If you only have salted butter, reduce the added salt in the recipe by half.
My layers came out domed/uneven. What happened?
This usually happens when the oven runs hot or the batter was overmixed. You can use baking strips around the pans to promote even baking, or simply level the tops with a serrated knife once cooled.
Can I make cupcakes with this recipe?
Absolutely. This batter makes about 24 cupcakes. Fill each liner ⅔ full and bake at 350°F for 18–22 minutes.
Why is my buttercream too thick or too thin?
Too thick: add heavy cream, one tablespoon at a time. Too thin: add more sifted powdered sugar, a few tablespoons at a time.
Can I add food coloring to the frosting?
Yes! Gel food coloring works best since it doesn’t thin out the frosting like liquid dyes do.
Wrapping Up
This vanilla cake is one of those recipes you’ll come back to again and again.
It’s the birthday cake. The celebration cake. The “I just wanted something good” cake. Once you make it, you’ll understand why people request it on repeat.
Give it a go and let me know how it turned out in the comments below! And if you have any questions at all while you’re in the kitchen, drop them there too. I read every single one. 🎂