You know those desserts that look like they came straight out of a bakery window — the kind that make people say “wait, you actually made this?”
This is one of them.
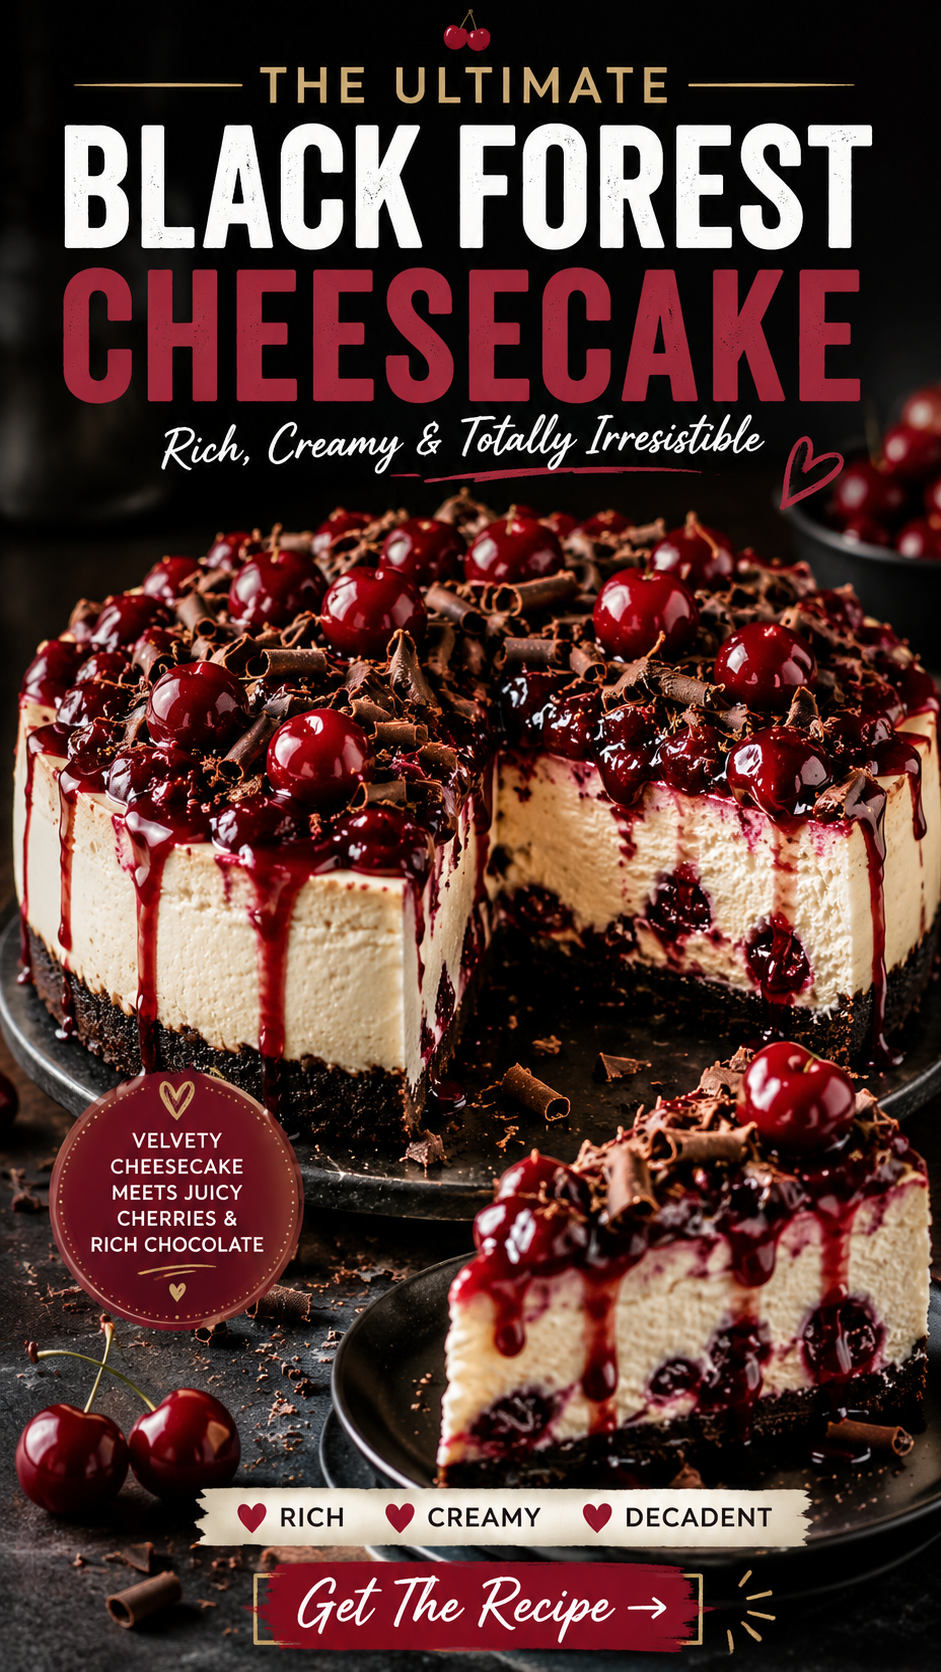
Black Forest Cheesecake is what happens when two of the world’s greatest desserts collide: silky New York-style cheesecake and classic Black Forest cake, complete with dark cherries, chocolate, and whipped cream. The result is so good it feels a little wrong.
And here’s what surprises most people: it’s not that hard to make. You just need to follow the steps, and the fridge does most of the work.
Recipe at a Glance
| Detail | Info |
|---|---|
| Prep Time | 30 minutes |
| Bake Time | 55–65 minutes |
| Chill Time | 6 hours (or overnight) |
| Total Time | ~8 hours |
| Servings | 12 slices |
| Skill Level | Intermediate |
| Best For | Dinner parties, birthdays, holidays |
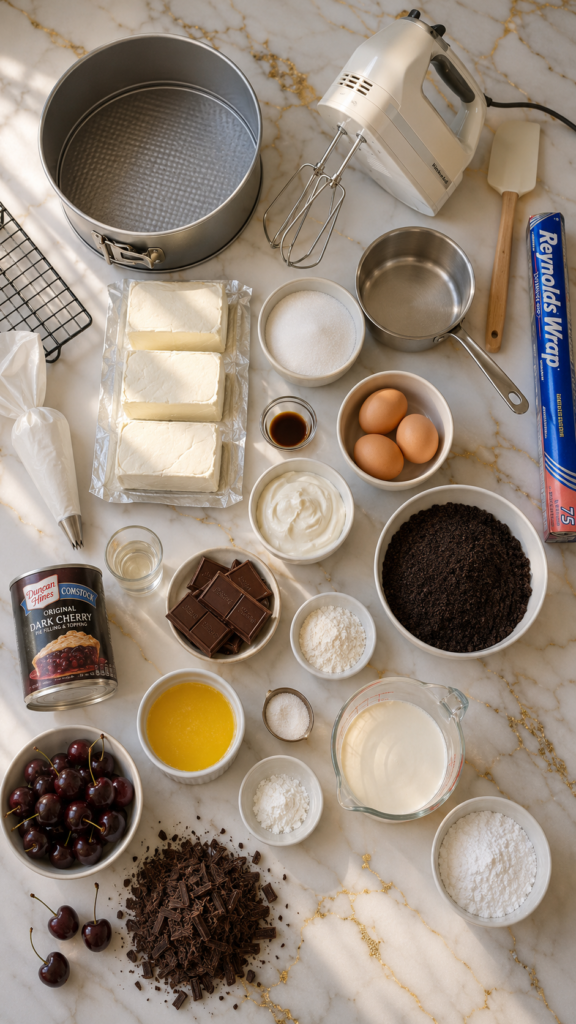
What You’ll Need
For the Chocolate Crust
- 2 cups (200g) chocolate Oreo cookie crumbs (filling removed)
- 5 tablespoons (70g) unsalted butter, melted
- 1 tablespoon granulated sugar
For the Cheesecake Filling
- 3 blocks (680g / 24 oz) full-fat cream cheese, room temperature
- 1 cup (200g) granulated sugar
- 3 large eggs, room temperature
- 1 cup (240ml) sour cream, room temperature
- 1 teaspoon pure vanilla extract
- 2 tablespoons all-purpose flour
- 3 oz (85g) dark chocolate, melted and cooled
For the Cherry Layer
- 1 can (21 oz / 595g) dark cherry pie filling
- 1 tablespoon Kirsch (cherry brandy) — optional but highly recommended
- 1 teaspoon cornstarch mixed with 1 tablespoon cold water
For the Topping
- 1½ cups (360ml) heavy whipping cream, cold
- 3 tablespoons powdered sugar
- 1 teaspoon pure vanilla extract
- Dark chocolate shavings or curls, for garnish
- Fresh cherries with stems, for garnish (optional)
Tools You’ll Need
- 9-inch (23cm) springform pan — non-negotiable for cheesecake
- Stand mixer or hand electric mixer
- Large mixing bowls
- Rubber spatula
- Roasting pan (for the water bath)
- Aluminum foil (to wrap the springform pan)
- Small saucepan
- Offset spatula or the back of a spoon
- Wire cooling rack
- Piping bag with star tip (optional, for whipped cream)
Pro Tips
These are the things that separate a cracked, sunken cheesecake from a silky, perfect one. Read them before you start.
- Room temperature ingredients are non-negotiable. Cold cream cheese and eggs cause lumps and uneven baking. Pull everything out of the fridge at least an hour before you start.
- The water bath is your best friend. Wrap the outside of the springform pan in two layers of foil, set it in a roasting pan, and fill the roasting pan halfway with hot water before putting it in the oven. This creates steam, prevents cracks, and gives you that smooth, creamy texture.
- Don’t overbake. The cheesecake is done when the edges are set and the center has a slight wobble — like Jell-O. It will firm up as it cools. Overbaking = dry, cracked cheesecake.
- The overnight chill is worth it. Texture-wise, a cheesecake that’s chilled overnight is noticeably creamier and easier to slice than one that’s only had a few hours. Plan ahead if you can.
- Score your slices with a hot knife. Before cutting, dip your knife in hot water and wipe it dry. Do this between each slice. You’ll get those clean, restaurant-style cuts.
How to Make Black Forest Cheesecake
Step 1: Make the Crust
Preheat your oven to 325°F (160°C).
Pulse the Oreo cookies in a food processor until they’re fine crumbs — no big chunks. Mix with melted butter and sugar until the crumbs look like wet sand.
Press the mixture firmly into the bottom of your springform pan, using the bottom of a glass to compact it. Go about ½ inch up the sides if you can.
Bake for 10 minutes, then let it cool while you make the filling.
Step 2: Make the Cheesecake Filling
Beat the cream cheese on medium speed until completely smooth — about 2 minutes. Scrape down the sides of the bowl as you go.
Add the sugar and beat for another minute.
Add eggs one at a time, mixing on low after each addition. Don’t overmix once the eggs go in (this introduces air bubbles that cause cracks).
Add the sour cream, vanilla, and flour. Mix until just combined.
Pour out roughly ¼ of the batter into a separate bowl and stir in the melted dark chocolate. Set aside.
Step 3: Layer the Batter
Pour the plain cheesecake batter over the cooled crust and smooth the top.
Drop spoonfuls of the chocolate batter on top and use a skewer or toothpick to swirl it in gently. You don’t need to swirl too much — keep some contrast.
Step 4: Bake with the Water Bath
Wrap the outside of the springform pan in two layers of foil, pressing it up the sides so no water seeps in.
Set the pan in your roasting pan and fill the roasting pan with hot water until it reaches halfway up the springform pan.
Bake for 55–65 minutes at 325°F (160°C). The edges should be set; the center should still have a gentle wobble.
Turn the oven off, crack the door open a few inches, and let the cheesecake sit inside for 1 hour. This gradual cool-down prevents cracking.
Step 5: Chill
Once it reaches room temperature, cover the cheesecake loosely and refrigerate for at least 6 hours, or overnight.
Step 6: Make the Cherry Topping
Heat the cherry pie filling in a small saucepan over medium-low heat. Add the Kirsch if using.
Stir in the cornstarch-water mixture and cook for 2–3 minutes, until slightly thickened and glossy. Let it cool completely before adding it to the cheesecake.
Step 7: Add the Whipped Cream and Assemble
Beat the cold heavy cream with powdered sugar and vanilla until stiff peaks form.
Spoon or pipe the whipped cream around the edge of the cheesecake. Spoon the cooled cherry topping into the center.
Finish with dark chocolate shavings and fresh cherries. That’s it. You’re done. 🍒
Substitutions and Variations
Not everyone has the exact same ingredients on hand. Here’s what you can swap:
Crust alternatives:
- Chocolate graham crackers work great
- Brownie crumbles if you’re feeling extra
- Gluten-free chocolate cookies for a GF version
Cream cheese:
- Use full-fat only for the real deal — reduced-fat will make the texture noticeably less creamy
Kirsch (cherry brandy):
- Leave it out entirely, or substitute with 1 tsp almond extract for a different depth of flavor
- Cherry juice works too
Sour cream:
- Full-fat Greek yogurt is a 1:1 swap
Dark chocolate in the batter:
- Semi-sweet chocolate works fine
- Skip the chocolate swirl entirely for a plain cheesecake base
For a no-bake version:
- Use a no-bake cheesecake filling (cream cheese, whipped cream, sugar, vanilla) and skip the eggs and water bath entirely. Still incredible, just slightly less dense.
Make-Ahead Tips
This is actually a perfect make-ahead dessert.
- Crust: Make it up to 3 days ahead and keep it covered in the fridge.
- Full cheesecake (without toppings): Bakes and chills up to 2 days ahead. Add the cherry topping and whipped cream the day you serve it.
- Cherry topping: Can be made 3–4 days ahead and stored in an airtight container in the fridge.
Nutritional Breakdown (Per Slice, ~1/12 of the cheesecake)
| Nutrient | Approx. Amount |
|---|---|
| Calories | 520 kcal |
| Total Fat | 36g |
| Saturated Fat | 21g |
| Carbohydrates | 44g |
| Sugar | 32g |
| Protein | 7g |
These are estimates and will vary based on exact brands and portions.
Meal Pairing Suggestions
Black Forest Cheesecake is rich, so it pairs well with light, simple mains:
- A roast chicken dinner
- A creamy pasta (keep it on the lighter side)
- A charcuterie spread for a dinner party
- Coffee or espresso after dinner — the bitterness cuts through the sweetness perfectly
Leftovers and Storage
Fridge: Cover the cheesecake (or individual slices) tightly with plastic wrap or store in an airtight container. Keeps for up to 5 days.
Freezer: Wrap individual slices in plastic wrap, then foil, and freeze for up to 2 months. Thaw overnight in the fridge before eating. The texture holds up really well.
Important: Once the cherry topping and whipped cream have been added, the cheesecake is best eaten within 2–3 days. The whipped cream starts to weep after that.
FAQ
Can I make this without a springform pan?
It’s really designed for one. A springform pan lets you release the cheesecake without flipping it. If you don’t have one, a deep cake pan lined with parchment can work in a pinch, but getting it out cleanly is tricky.
My cheesecake cracked. What happened?
Usually one of three things: overmixing after adding the eggs, skipping the water bath, or cooling it too fast. The good news? The cherry topping covers it completely. No one will ever know.
Can I use fresh cherries instead of canned?
Yes! Pit about 2 cups of fresh dark cherries, cook them down with a little sugar and lemon juice until jammy, then add the cornstarch slurry. It’s even better than canned.
Do I have to add the Kirsch?
Nope. It adds that classic Black Forest depth, but the cheesecake is delicious without it.
My cheesecake has a slight wobble after baking. Is it done?
Yes! A slight jiggle in the center is exactly what you want. It will fully set as it cools. If the whole thing is sloshing around, give it another 5–10 minutes.
Can I use a different flavor of pie filling?
Absolutely. Blueberry or raspberry would both be delicious here. Stick with dark, rich fruits that can stand up to the chocolate.
Wrapping Up
If you’ve been waiting for a reason to make a real, showstopper dessert from scratch — this is it.
Black Forest Cheesecake looks like a big project but it’s mostly hands-off time. The oven does the hard part. The fridge does the rest. And what you end up with is something that genuinely looks and tastes like it came from a patisserie.
Make it for a birthday, a dinner party, or just because a random Tuesday deserves a treat. And once you’ve made it, I’d love to hear about it in the comments below. Did the water bath work for you? Did you add the Kirsch? Any questions at all — drop them down there and I’ll help you out.