I made these once on a random Sunday and now I genuinely can’t order waffles at a brunch spot without feeling a little disappointed.
That’s how good they are.
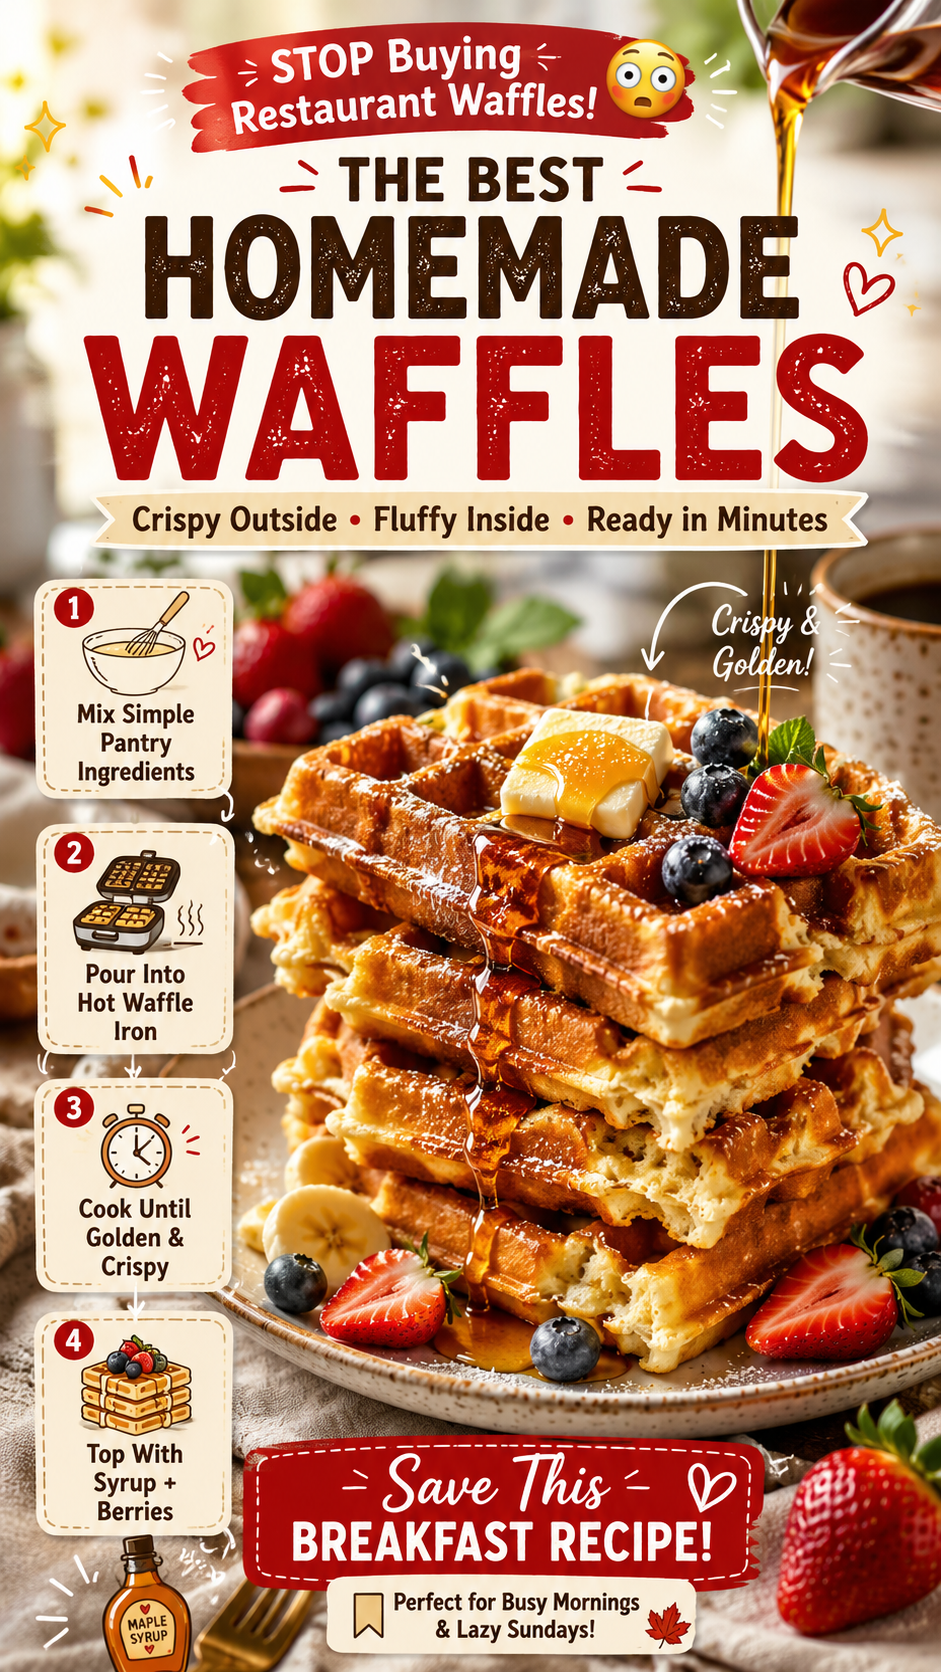
And the wild thing? The recipe takes about 20 minutes, uses pantry staples, and the texture is nothing like the sad, soggy squares you get from a box mix. We’re talking crispy edges, fluffy centers, golden all the way through.
There’s one small trick that most recipes skip, and it changes everything. Stick around, because I’ll share it before you get to the instructions.
Recipe at a Glance
| Detail | Info |
|---|---|
| Prep Time | 10 minutes |
| Cook Time | 15-20 minutes |
| Total Time | ~30 minutes |
| Servings | 4 (makes ~6-8 waffles) |
| Difficulty | Easy |
| Best For | Breakfast, brunch, meal prep |
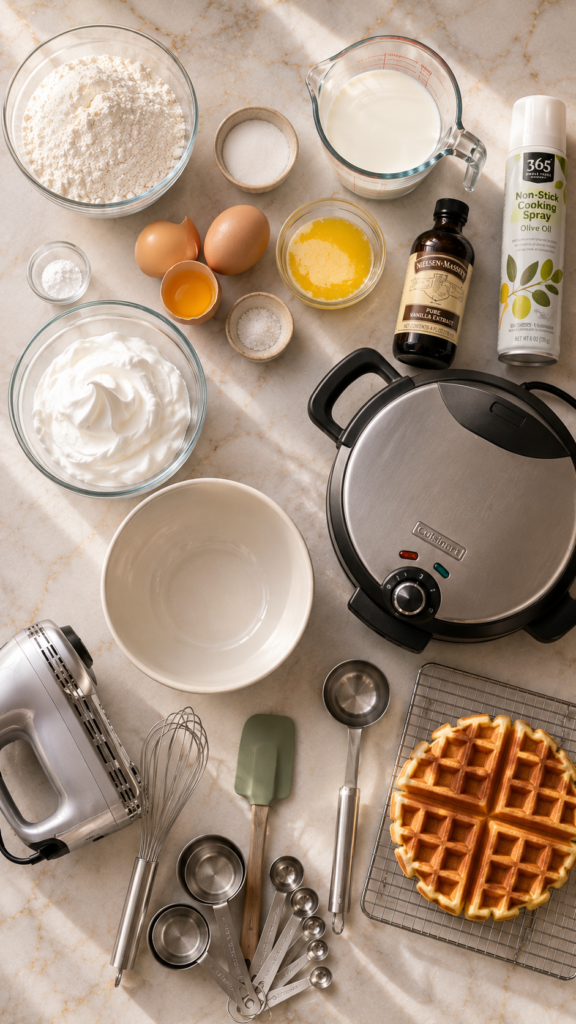
What You’ll Need
Dry Ingredients
- 2 cups all-purpose flour
- 2 tbsp granulated sugar
- 1 tbsp baking powder
- ½ tsp salt
Wet Ingredients
- 2 large eggs, separated
- 1¾ cups whole milk
- ½ cup unsalted butter, melted and slightly cooled
- 1 tsp pure vanilla extract
For the Waffle Iron
- Non-stick cooking spray or a light brush of melted butter
Tools You’ll Need
- Waffle iron (Belgian or classic, your call)
- 2 large mixing bowls
- Hand mixer or stand mixer
- Whisk
- Rubber spatula
- Measuring cups and spoons
- Ladle or ¾ cup measuring cup (for pouring batter)
- Wire cooling rack
Pro Tips
These are the things I wish someone had told me before I made my first batch.
1. Separate your eggs and whip the whites.
This is the trick. Beat the egg whites to stiff peaks and fold them into the batter at the end. It sounds fussy, but it takes about 2 minutes and the difference in texture is unreal. Crispy outside, cloud-like inside. 😍
2. Don’t overmix.
Lumpy batter = better waffles. Overmixing develops the gluten, which makes them chewy instead of light. Stir until just combined and walk away.
3. Let the batter rest for 5 minutes.
Once mixed, set it aside while the waffle iron heats up. The baking powder activates, the flour hydrates, and you get a better rise.
4. Don’t open the waffle iron too early.
I know the temptation is real. But opening it too soon tears the waffle in half. Wait until the steam slows down, then check. No steam = done.
5. Use a wire rack, not a plate.
Stacking waffles on a plate traps steam underneath and makes them soggy within minutes. A wire rack keeps them crisp while you finish the batch.
How to Make Homemade Waffles
Step 1: Preheat your waffle iron.
Get it hot before any batter touches it. A properly heated iron gives you that signature golden crust right away.
Step 2: Separate the eggs.
Put the yolks in one bowl and the whites in another. You’ll use both.
Step 3: Mix the dry ingredients.
In your large bowl, whisk together the flour, sugar, baking powder, and salt. Set aside.
Step 4: Mix the wet ingredients (minus the whites).
Whisk the egg yolks, milk, melted butter, and vanilla together in a separate bowl until combined.
Step 5: Combine wet and dry.
Pour the wet ingredients into the dry and stir gently until just combined. A few lumps are totally fine and actually what you want. Let the batter rest for 5 minutes.
Step 6: Beat the egg whites.
Using a hand mixer or stand mixer, beat the egg whites on medium-high until stiff peaks form. This takes about 2 minutes.
Step 7: Fold in the egg whites.
Use a rubber spatula to gently fold the beaten whites into the batter in two additions. Don’t stir aggressively. You want to keep as much air as possible in there.
Step 8: Cook your waffles.
Grease the waffle iron lightly. Pour in enough batter to fill the iron without overflowing (usually about ¾ cup). Close the lid and cook until the steam slows way down, about 4-5 minutes. Check, and cook another 30-60 seconds if needed for deeper color.
Step 9: Cool on a wire rack.
Transfer each waffle to a wire rack immediately. Keep in a 200°F (93°C) oven to stay warm while you finish the rest.
Substitutions and Variations
Not everyone’s working with the same pantry. Here’s how to make it work:
Ingredient Swaps
- Whole milk → buttermilk (adds a slight tang and even more fluffiness), oat milk, or almond milk all work
- All-purpose flour → 1:1 gluten-free flour blend for GF waffles
- Butter → melted coconut oil works great and adds a subtle flavor
- Sugar → brown sugar for a slightly richer, caramel-like sweetness
Fun Variations to Try
- Blueberry waffles → fold ½ cup fresh blueberries into the batter
- Cinnamon brown sugar → add 1 tsp cinnamon + swap white sugar for brown
- Savory waffles → skip the vanilla and sugar, add shredded cheddar and chives
- Chocolate chip → fold in ¼ cup mini chocolate chips right before cooking
- Lemon poppyseed → add 1 tbsp lemon zest + 1 tsp poppyseeds
Make-Ahead Tips
Yes, you can prep these ahead of time and still get great results.
- The dry mix: Combine all dry ingredients and store in an airtight container for up to 1 month. Just add wet ingredients when ready.
- Cooked waffles: Make a full batch, cool completely on the wire rack, then freeze in a single layer. Once frozen, stack with parchment between each one. They’ll keep for up to 3 months.
- Reheat from frozen: Pop straight into the toaster on medium-high. They come out crispy again, almost like fresh. 🙌
Nutritional Breakdown (Per Waffle, Approx.)
| Nutrient | Amount |
|---|---|
| Calories | ~280 kcal |
| Carbohydrates | 34g |
| Protein | 7g |
| Fat | 13g |
| Saturated Fat | 7g |
| Sugar | 5g |
| Fiber | 1g |
| Sodium | 310mg |
Values are approximate and based on 6 waffles per batch with whole milk and butter.
Diet-Friendly Swaps
| Diet | Swap |
|---|---|
| Dairy-free | Oat milk + coconut oil |
| Gluten-free | 1:1 GF flour blend |
| Lower sugar | Reduce sugar to 1 tbsp or omit |
| Higher protein | Replace ¼ cup flour with protein powder |
Meal Pairing Ideas
Waffles are surprisingly versatile. Don’t stop at maple syrup.
- Classic: Salted butter + pure maple syrup
- Fruity: Fresh strawberries, blueberries, or sliced bananas + whipped cream
- Indulgent: Nutella + crushed hazelnuts
- Savory brunch: Fried egg + crispy bacon on top
- Dessert: Vanilla ice cream + hot fudge drizzle
- Light: Greek yogurt + honey + granola
Leftovers and Storage
Fridge: Store cooled waffles in an airtight container for up to 3 days. Reheat in the toaster or oven at 350°F (175°C) for 5-7 minutes.
Freezer: Freeze for up to 3 months. Layer with parchment to prevent sticking. Reheat straight from frozen in the toaster.
Don’t microwave them. I know it’s tempting, but microwaving makes them soft and rubbery. The toaster is the move every time.
FAQ
Can I make waffles without a waffle iron?
Not exactly the same, but you can cook the batter on a griddle or skillet for fluffy pancakes using the exact same recipe. You lose the crispy pockets, but the flavor is identical.
Why are my waffles sticking to the iron?
Almost always a greasing issue or the iron wasn’t hot enough before adding batter. Make sure to spray or brush the iron every single time, even if it’s non-stick.
Why are my waffles soggy?
Two likely culprits: steam trapped underneath (use a wire rack!) or the iron wasn’t hot enough to start. A properly hot iron seals the outside quickly and locks the crisp in.
Can I double the recipe?
Absolutely. Just scale everything up and keep the beaten egg white step the same. Make one big batch and freeze the extras.
Can I use a mini waffle maker?
Yes! Just reduce the batter to about ¼ cup per waffle and check for doneness a minute or two earlier.
My batter is too thick. What do I do?
Add a splash of milk, one tablespoon at a time, until it pours easily from a ladle. Batter consistency varies slightly depending on your flour brand.
Do I really have to separate the eggs?
You don’t have to. You’ll still get a solid waffle. But separating them and whipping the whites is what takes the texture from good to genuinely great.
Wrapping Up
If you’ve never made waffles from scratch before, I really want this to be the recipe that changes that for you.
It’s not complicated. It’s not fancy. And it doesn’t require anything you don’t already have in your kitchen.
But the result? So much better than anything pre-made or restaurant-bought. Crispy, fluffy, golden, and honestly kind of addictive. ☀️
Give it a shot this weekend and then come back and drop a comment below. I’d love to know how yours turned out, what toppings you went with, and any questions you have along the way. Seriously, the comment section is my favorite part of the blog.
Go make some waffles.