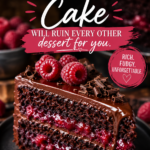
You know that moment when you take one bite of something and immediately think, I need to make this at home?
That’s exactly what this cake does.
It’s rich, deeply chocolatey, and just tart enough from the raspberries that every single layer feels like it’s doing something. Not the usual chocolate-on-chocolate situation that gets heavy fast. This one has balance, and honestly? That’s what makes you go back for a second slice without even thinking about it.
And no, you don’t need to be a professional baker to pull this off.
Recipe at a Glance
| Detail | Info |
|---|---|
| Prep Time | 30 minutes |
| Bake Time | 35 minutes |
| Cooling + Assembly | 60 minutes |
| Total Time | ~2 hours |
| Servings | 12 slices |
| Difficulty | Intermediate |
| Best For | Birthdays, dinner parties, date night, or a random Tuesday |
What Makes This Cake Actually Special
Here’s the thing most chocolate cake recipes miss: acidity.
Raspberries are naturally tart, and that tartness cuts right through the richness of dark chocolate in a way that keeps the whole thing from feeling like a sugar bomb. You get depth. You get contrast. You get that why can’t I stop eating this feeling.
Fun fact: raspberries have a pH of about 3.2, which is close to lemon juice. That’s why bakers have used them alongside chocolate since the 1800s. The combo isn’t trendy. It’s classic for a reason.
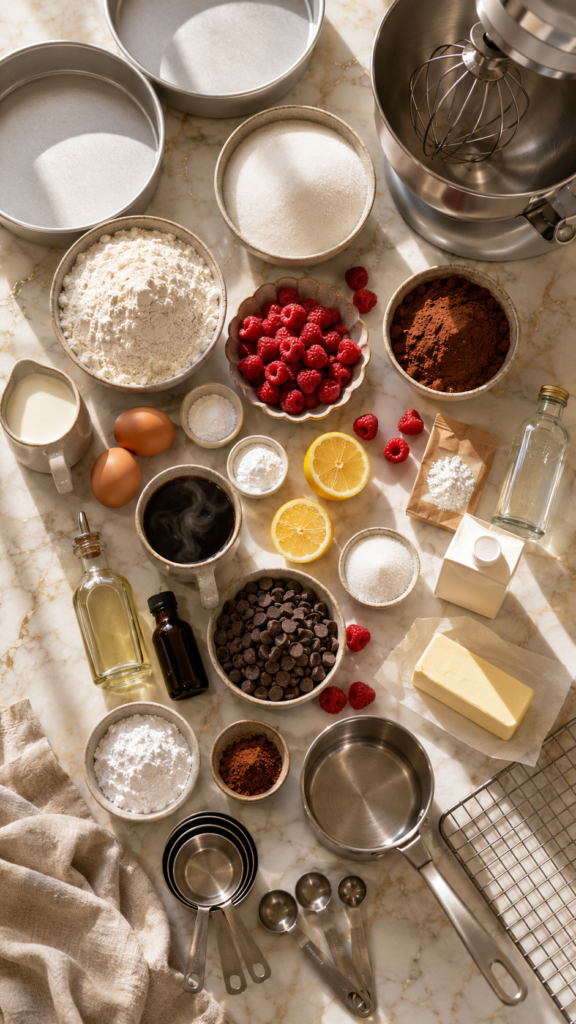
What You’ll Need
For the Chocolate Cake Layers
- 2 cups (250g) all-purpose flour
- 2 cups (400g) granulated white sugar
- ¾ cup (75g) unsweetened Dutch-process cocoa powder
- 2 tsp baking soda
- 1 tsp baking powder
- 1 tsp fine sea salt
- 2 large eggs, room temperature
- 1 cup (240ml) whole buttermilk, room temperature
- 1 cup (240ml) hot strong brewed coffee (or hot water)
- ½ cup (120ml) neutral oil (canola or vegetable)
- 1 tsp pure vanilla extract
For the Raspberry Filling
- 2 cups (250g) fresh raspberries (or frozen, thawed and drained)
- 3 tbsp granulated sugar
- 1 tbsp lemon juice
- 1 tsp cornstarch mixed with 1 tbsp cold water
For the Chocolate Ganache Frosting
- 1½ cups (255g) dark chocolate chips or finely chopped dark chocolate (60-70% cacao)
- 1 cup (240ml) heavy cream
- 2 tbsp unsalted butter, softened
- 1 tbsp light corn syrup (optional, for shine)
For the Whipped Chocolate Buttercream (optional layer between the cake)
- 1 cup (225g) unsalted butter, softened
- 2½ cups (300g) powdered sugar, sifted
- ½ cup (50g) unsweetened cocoa powder
- 3-4 tbsp heavy cream
- 1 tsp vanilla extract
- Pinch of salt
For Garnish
- Fresh raspberries
- Dark chocolate shavings or curls (optional)
- Powdered sugar for dusting (optional)
Tools You’ll Need
- Two 9-inch round cake pans
- Parchment paper
- Stand mixer or hand mixer
- Mixing bowls (multiple sizes)
- Whisk
- Rubber spatula
- Small saucepan
- Offset spatula (for frosting)
- Cake turntable (helpful but not required)
- Cooling racks
- Measuring cups and spoons
- Kitchen scale (recommended for accuracy)
- Serrated knife (for leveling the cake layers if needed)
Pro Tips
These are the things I wish someone had told me the first time I made a layered cake.
- Don’t skip the coffee. Hot coffee in chocolate cake doesn’t make it taste like coffee. It deepens and intensifies the chocolate flavor in a way that nothing else does. If you truly can’t use coffee, hot water works, but you’ll notice the difference.
- Room temperature ingredients matter. Cold eggs and cold buttermilk don’t incorporate as well into the batter, which means uneven texture. Pull them out of the fridge at least 30 minutes before you start.
- Cool your cakes completely before frosting. This is the step people rush and immediately regret. Even slightly warm cake will melt your ganache and turn the whole thing into a mess. Give it at least an hour on the rack.
- Make the raspberry filling first. It needs time to cool and thicken before you use it. A warm filling between layers = sliding cake. Not what we want.
- Chill between layers. If your kitchen is warm, pop the assembled cake in the fridge for 15-20 minutes between adding each layer. It holds everything in place and makes the final frosting application so much cleaner.
Substitutions and Variations
Not everyone is working with the exact same pantry, and that’s fine.
For the flour: Dutch-process cocoa can be swapped with natural cocoa powder, but your cake will be slightly lighter in color and less intense in flavor.
For buttermilk: Mix 1 cup of whole milk with 1 tablespoon of white vinegar or lemon juice. Let it sit for 5 minutes. Done.
For the eggs (vegan option): Use 2 flax eggs (2 tbsp ground flaxseed + 6 tbsp water, rested for 10 minutes).
For gluten-free: A 1:1 gluten-free flour blend works well in this recipe. The texture will be slightly denser but still delicious.
Raspberry variations:
- Swap raspberries for blackberries for a deeper, jammier filling
- Add a tablespoon of raspberry liqueur (like Chambord) to the filling for a more grown-up flavor
- Stir a handful of fresh raspberries directly into the buttercream for a fruity frosting
Want more drama? Add a mirror glaze over the ganache for a seriously showstopping finish. It’s an extra step, but the results are jaw-dropping.
Make-Ahead Tips
This cake is actually a great candidate for making in stages.
- Cake layers: Bake up to 2 days ahead, wrap tightly in plastic wrap once cooled, and store at room temperature.
- Raspberry filling: Make up to 3 days ahead and refrigerate in an airtight container.
- Ganache: Make the day before and store at room temperature (if your kitchen isn’t warm) or in the fridge. Reheat gently before using.
- Assembled cake: Can be made a full day ahead and refrigerated. Bring to room temperature for 30-45 minutes before serving for the best texture.
How to Make the Chocolate Raspberry Cake
Step 1: Make the Raspberry Filling
In a small saucepan over medium heat, combine the raspberries, sugar, and lemon juice.
Stir and cook for about 5 minutes until the raspberries break down completely. Add the cornstarch-water mixture and stir for another 2 minutes until the filling thickens.
Remove from heat and let it cool completely. Refrigerate until you’re ready to use it.
Step 2: Prep Your Pans and Oven
Preheat your oven to 350°F (175°C).
Grease both 9-inch cake pans with butter or non-stick spray. Line the bottoms with parchment paper circles, then grease the parchment too.
Step 3: Mix the Dry Ingredients
In a large mixing bowl, whisk together the flour, sugar, cocoa powder, baking soda, baking powder, and salt until fully combined.
Set aside.
Step 4: Mix the Wet Ingredients
In a separate bowl, whisk together the eggs, buttermilk, oil, and vanilla.
Step 5: Combine and Add Coffee
Pour the wet ingredients into the dry ingredients and mix until just combined.
Add the hot coffee slowly while mixing on low speed (or whisking by hand). The batter will be thin. That’s completely normal and exactly what you want.
Step 6: Bake
Divide the batter evenly between the two prepared pans.
Bake for 32-35 minutes, or until a toothpick inserted in the center comes out with just a few moist crumbs (not wet batter).
Let the cakes cool in the pans for 10 minutes, then turn out onto wire racks and cool completely.
Step 7: Make the Ganache
Heat the heavy cream in a small saucepan over medium heat until it just begins to simmer. Don’t let it boil.
Pour the hot cream over the chocolate chips in a heatproof bowl. Let it sit for 2 minutes without stirring, then add the butter and corn syrup and stir from the center out until completely smooth and glossy.
Let the ganache cool at room temperature until it’s spreadable, about 45-60 minutes. You want it to hold its shape but not be rock solid.
Step 8: Make the Buttercream (if using)
Beat the softened butter with a mixer on medium-high for 2-3 minutes until pale and fluffy.
Add the sifted powdered sugar and cocoa powder in two additions, mixing on low first to avoid a cloud of sugar. Add the cream, vanilla, and salt, then beat on high for 2 minutes until light and smooth.
Step 9: Assemble
Place the first cake layer on your serving plate or cake board.
Spread a thin layer of buttercream around the edge of the top (this creates a “dam” to hold the raspberry filling in). Spoon the raspberry filling in the center and spread evenly.
Place the second cake layer on top, pressing down gently.
Apply a thin crumb coat of buttercream or ganache all over the outside of the cake. Refrigerate for 20 minutes.
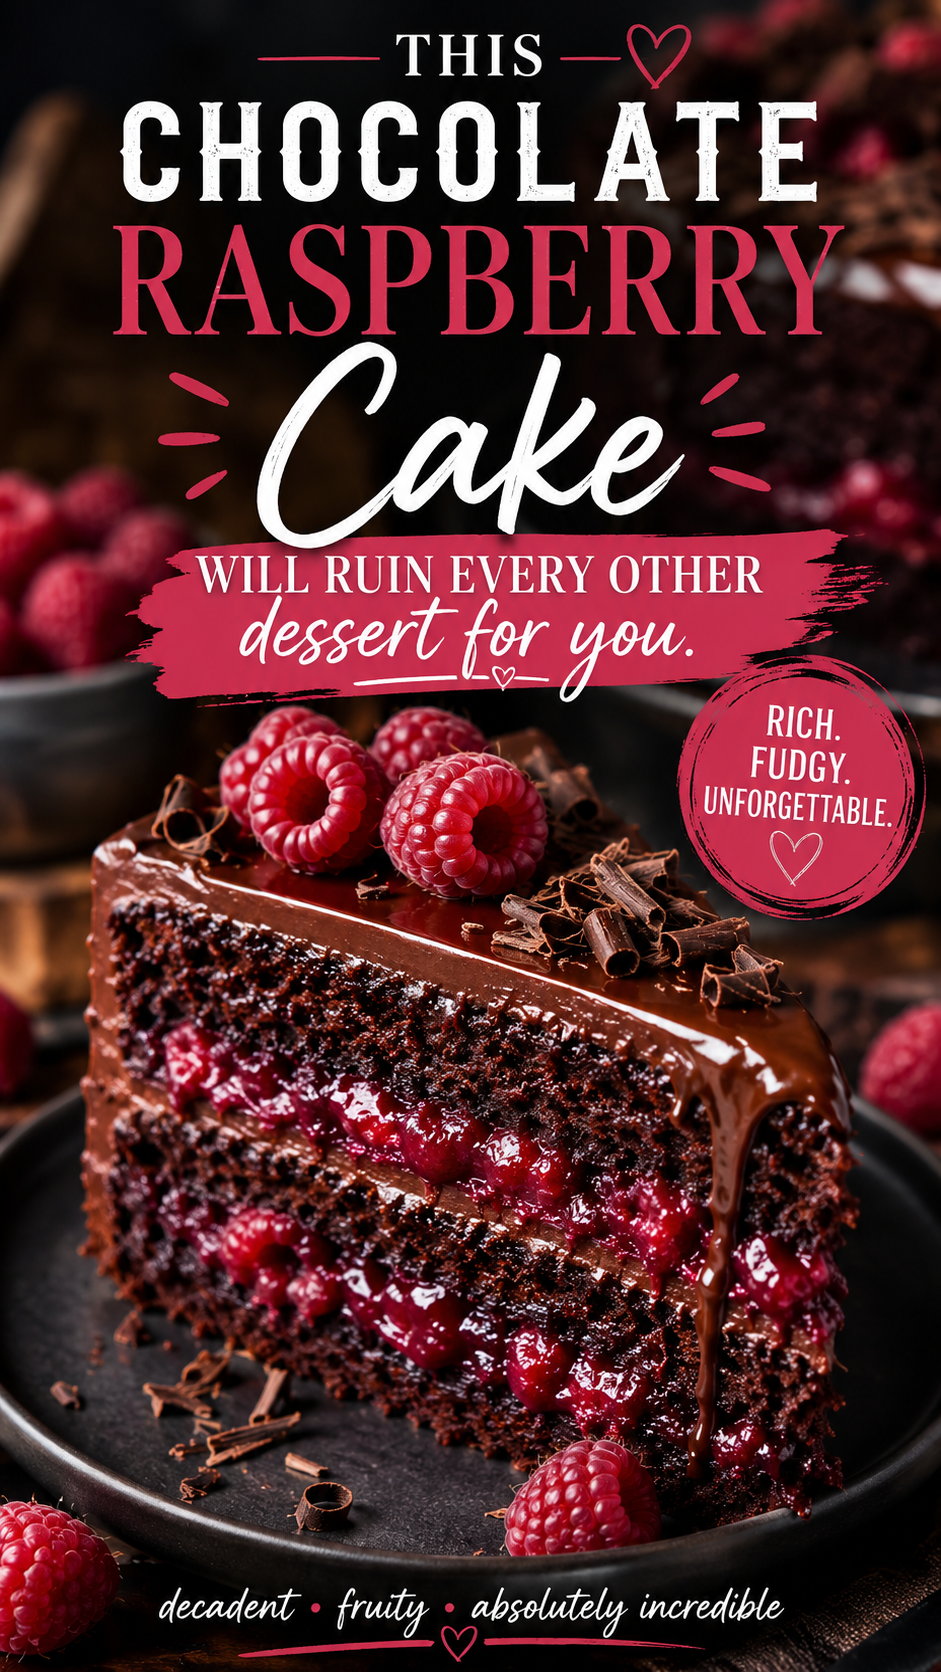
Apply your final layer of ganache and smooth it out. Top with fresh raspberries and chocolate shavings if you like.
Nutritional Breakdown (Per Slice, Approx.)
| Nutrient | Amount |
|---|---|
| Calories | ~520 |
| Total Fat | 28g |
| Saturated Fat | 14g |
| Carbohydrates | 65g |
| Sugar | 45g |
| Protein | 6g |
| Fiber | 4g |
Based on 12 slices. Values will vary depending on exact brands and ingredients used.
Dietary notes:
- Can be made gluten-free with a 1:1 flour swap
- Can be made dairy-free using coconut cream for the ganache and dairy-free butter
- Not suitable for nut allergies if your chocolate contains nut traces (always check labels)
Meal Pairings
This cake pairs incredibly well with:
- A scoop of vanilla bean ice cream (the cold + warm contrast is everything)
- A dollop of fresh whipped cream with a tiny pinch of salt
- A glass of cold brew coffee or espresso
- For a dinner party: serve alongside a cheese board as a sweet ending to a savory evening
Leftovers and Storage
- Room temperature: Covered cake dome, up to 2 days (if your kitchen isn’t too warm)
- Refrigerator: Airtight container or covered with plastic wrap, up to 5 days. Bring to room temperature before serving.
- Freezer: Individual slices can be wrapped in plastic wrap and then foil and frozen for up to 2 months. Thaw overnight in the fridge.
One thing to know: ganache gets firmer when refrigerated. If you’re pulling it straight from the fridge, give it 30 minutes on the counter so the cake and frosting come back to their proper texture. Cold ganache is good. Room temperature ganache is great.
FAQ
Can I use frozen raspberries?
Yes. Thaw them completely first and drain off the extra liquid before making the filling. Frozen raspberries tend to release more liquid than fresh, so your filling may need an extra minute on the stove to thicken properly.
Can I make this as a sheet cake instead of a layer cake?
Absolutely. Use a 9×13 inch pan and bake at the same temperature for about 38-42 minutes. You’ll still have a delicious result, just without the layered presentation.
My ganache turned out grainy. What happened?
This usually means the cream got too hot and “broke” the chocolate. To fix it, try adding a tablespoon of warm cream and stirring gently from the center out. If it’s still grainy, a small splash of warm whole milk can bring it back together.
Can I add raspberry flavor to the cake layers too?
You can fold about ½ cup of fresh raspberries into the batter just before pouring it into the pans. They’ll break down slightly during baking but add little pockets of raspberry throughout. Just know the baking time might increase by a few minutes.
My cake layers domed in the middle. How do I fix that?
Use a serrated knife to level them before assembling. A flat top layer is key to a cake that stacks properly and doesn’t look lopsided. It takes 30 seconds and makes a huge difference.
Is Dutch-process cocoa really that different from regular cocoa?
Yes, noticeably. Dutch-process cocoa is treated with alkali which neutralizes acidity and gives it a smoother, darker, more intensely chocolatey flavor. Regular natural cocoa is more acidic and lighter in color. Both work here, but Dutch-process will give you that deep, almost fudgy chocolate flavor that makes this cake really stand out.
Wrapping Up
Look, you could buy a chocolate cake from a bakery. You could grab a box mix. But you’d be missing out on something.
Making this from scratch means your kitchen smells incredible for an hour, you know exactly what went into it, and when you take that first slice, you actually feel proud of it. That matters.
The raspberry filling alone is worth making. The ganache alone could be eaten with a spoon. Together, on a cake you made? It’s the kind of thing people remember.
So give it a go this weekend. Or make it for someone’s birthday and watch their face when they see it. And when you do, drop a comment below and tell me how it turned out. Questions, tweaks, total wins — I want to hear all of it. 🍫