“I made them once. And then I had to hide them from myself.”
You already know the feeling. You walk past a donut shop, catch that smell, and suddenly your willpower is completely gone.
Now multiply that by making them in your own kitchen. From scratch.
These homemade chocolate donuts are soft, fluffy, and coated in a rich chocolate glaze that sets perfectly. No weird ingredients. No bakery skills required. Just a surprisingly simple process that ends with something you’ll be proud of.
And heads up — once you make these, buying donuts from a store will feel like a downgrade. 🍩
📋 Recipe at a Glance
Prep Time: 20 minutes
Rise Time: 1–1.5 hours
Cook Time: 2–3 min per batch
Total Time: ~2 hours
Yield: 12 donuts
Difficulty: Beginner-friendly
Method: Deep-fried
Best For: Weekend treats, brunches
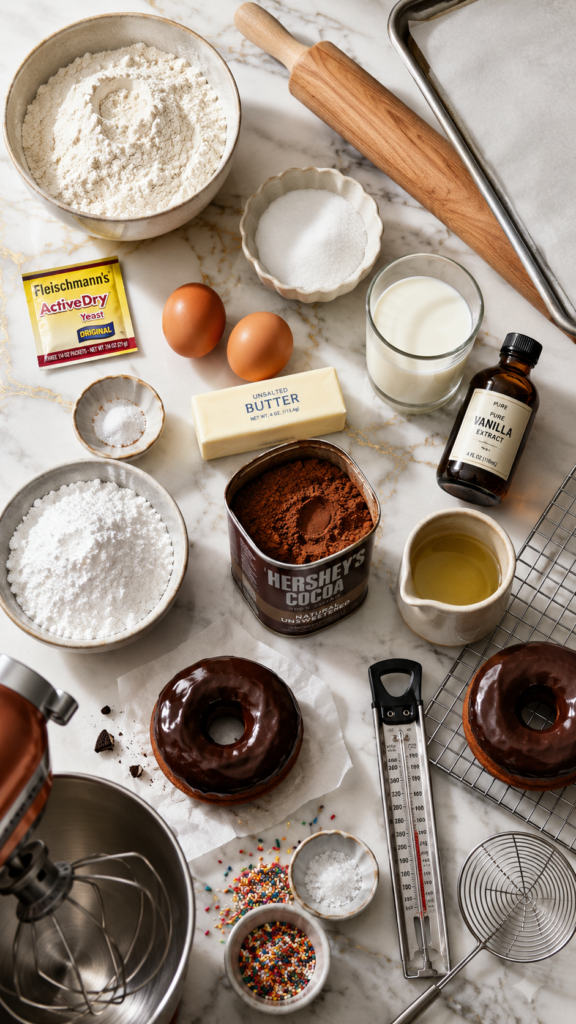
What You’ll Need
For the Donut Dough
- 2¼ tsp (7g) active dry yeast (1 standard packet)
- ¾ cup (180ml) whole milk, warmed to 110°F / 43°C
- ¼ cup (50g) granulated sugar
- 2 large eggs, room temperature
- ⅓ cup (75g) unsalted butter, softened
- 1 tsp pure vanilla extract
- ½ tsp fine salt
- 3 cups (375g) all-purpose flour, plus extra for dusting
- Neutral oil for frying (vegetable, canola, or sunflower) — about 4 cups / 1 liter
For the Chocolate Glaze
- 1½ cups (180g) powdered sugar, sifted
- 3 tbsp (22g) unsweetened cocoa powder
- 3–4 tbsp whole milk (adjust for consistency)
- ½ tsp pure vanilla extract
- Pinch of fine salt
Optional Toppings
- Rainbow sprinkles
- Crushed Oreos or graham crackers
- Flaky sea salt
- Melted white chocolate drizzle
- Chopped toasted hazelnuts
Tools You’ll Need
- Stand mixer with dough hook (or large bowl + hands)
- Rolling pin
- 3-inch round donut cutter (or two round cutters: 3″ + 1″)
- Baking sheet lined with parchment paper
- Deep heavy-bottomed pot or Dutch oven
- Candy/oil thermometer
- Wire rack + paper towels
- Tongs or spider strainer
- Two mixing bowls (one large, one medium)
- Whisk
- Kitchen towel or plastic wrap (for covering dough)
Pro Tips
- Temperature is everything with yeast. If your milk is too hot (above 115°F), it kills the yeast. Too cold, and it won’t activate. Aim for 110°F — it should feel comfortably warm on your wrist, like bathwater.
- Don’t skip the second rise. After cutting your donuts, let them puff up again for 30–45 minutes before frying. Skipping this step = dense donuts. Non-negotiable.
- Keep your oil steady at 350°F. Too hot and the outside burns before the inside cooks. Too cool and they absorb oil and get greasy. A thermometer here isn’t optional — it’s the difference between a great donut and a sad one.
- Glaze while still slightly warm. Not piping hot, but warm. The glaze sets into that glossy, crackly finish you see at bakeries. If the donuts are too cold, the glaze just sits there. If too hot, it slides off.
- Rest the dough properly. An under-proofed dough won’t give you that light, airy interior. When you poke the dough lightly with a finger and it springs back slowly — that’s your sign it’s ready.
How to Make Homemade Chocolate Donuts
Step 1: Activate the Yeast
Combine the warm milk, sugar, and yeast in the bowl of your stand mixer. Stir gently and let it sit for about 5–10 minutes until it turns foamy and smells a little like bread. If it doesn’t foam, your yeast is dead — start fresh.
Step 2: Build the Dough
Add the eggs, softened butter, vanilla, and salt to the yeast mixture. Mix on low speed, then slowly add the flour one cup at a time. Once combined, switch to the dough hook and knead on medium for about 6–8 minutes until you have a smooth, slightly tacky dough that pulls away from the bowl’s sides.
If you’re doing this by hand — it’ll take closer to 10 minutes of kneading. Your forearms will thank you later.
Step 3: First Rise
Lightly grease a large bowl, place the dough inside, cover with a clean kitchen towel, and let it rise in a warm spot for 1–1.5 hours until doubled in size. A turned-off oven with just the light on works perfectly.
Step 4: Roll & Cut
Punch the dough down gently (yes, actually punch it — it’s satisfying) and turn it out onto a lightly floured surface. Roll to about ½-inch thickness. Cut out your donuts using the donut cutter, then place them on parchment-lined baking sheets.
Re-roll the scraps to cut more donuts. Don’t waste that dough — the donut holes alone are worth eating straight out of the fryer.
Step 5: Second Rise
Cover the cut donuts loosely with plastic wrap or a kitchen towel and let them puff up for 30–45 minutes. They’ll look noticeably bigger and slightly jiggly. That’s what you want.
Step 6: Fry
Heat 3–4 inches of oil in your Dutch oven to 350°F (175°C). Fry 2–3 donuts at a time for about 60–90 seconds per side until golden brown. Remove with a spider strainer and drain on a wire rack lined with paper towels.
Don’t crowd the pot — it drops the oil temperature fast, and then you’ve got greasy donuts.
Step 7: Make the Chocolate Glaze
While the donuts cool slightly, whisk together the sifted powdered sugar, cocoa powder, vanilla, pinch of salt, and 3 tablespoons of milk. Add more milk, a teaspoon at a time, until you get a smooth glaze that coats the back of a spoon.
Step 8: Glaze & Top
Dip each donut face-down into the glaze, lift, let the excess drip off, and set on the wire rack. Add any toppings immediately before the glaze sets. Let them sit for 10–15 minutes until the glaze firms up — if you can wait that long.
Substitutions and Variations
| Swap This | For This | Notes |
|---|---|---|
| Whole milk (dough) | Oat milk or almond milk | Works well; use unsweetened |
| Butter (dough) | Vegan butter | Texture may vary slightly |
| All-purpose flour | Bread flour | Chewier, bakery-style texture |
| Active dry yeast | Instant yeast | Skip the activation step; mix directly |
| Deep frying | Baked in oven at 375°F for 10–12 min | Less rich, but lighter; still delicious |
| Chocolate glaze | Vanilla glaze or strawberry glaze | Swap cocoa for freeze-dried fruit powder |
| Plain chocolate glaze | Dark chocolate ganache | Melt 4 oz dark chocolate + 3 tbsp cream |
Baked Donut Variation: If frying feels like a lot right now, a baked version is totally doable. The texture is more like a soft cake than a classic fried donut, but the chocolate glaze on top more than makes up for it. Use a donut pan and bake at 375°F for 10–12 minutes.
Make-Ahead Tips
- Refrigerate the dough overnight. After the first rise, punch the dough down, cover tightly, and refrigerate. In the morning, pull it out, let it come to room temperature for 30 minutes, then roll, cut, and do the second rise before frying. This actually improves the flavor.
- Freeze the cut, unfried donuts. Place them on a parchment sheet in a single layer, freeze until solid, then transfer to a freezer bag. Thaw in the fridge overnight and do the second rise before frying.
- Make the glaze ahead of time. Store covered in the fridge for up to 3 days. Reheat gently and whisk before using — you may need a splash of milk to loosen it.
Nutritional Breakdown
Per donut (approximate, based on 12 donuts, fried)
| Nutrient | Amount |
|---|---|
| Calories | ~290 kcal |
| Total Fat | 12g |
| Saturated Fat | 4g |
| Carbohydrates | 40g |
| Sugar | 18g |
| Protein | 5g |
| Fiber | 1.5g |
| Sodium | 115mg |
Diet-friendly swaps: For a dairy-free version, use oat milk and vegan butter throughout. For a lower-sugar glaze, cut the powdered sugar by a third and add more cocoa for depth.
Meal Pairing Suggestions
These donuts are obviously perfect on their own, but they pair really well with:
- A strong cup of black coffee or an iced latte (the bitterness balances the sweetness perfectly)
- Chai tea — the spices complement the chocolate in a surprisingly good way
- A scoop of vanilla ice cream if you’re serving them warm as a dessert
- Fresh strawberries on the side for a brunch spread
Leftovers and Storage
- Room temperature: Store in an airtight container for up to 2 days. After that, they start losing their soft texture.
- Refrigerator: Up to 4 days, but let them come to room temperature before eating — cold donuts are a tragedy.
- Freezer: Freeze unglazed donuts for up to 2 months. Thaw at room temperature, then warm in the oven at 300°F for 5 minutes and glaze fresh.
- Reheating: A quick 10-second burst in the microwave brings back that soft, warm texture. Or 3–5 minutes in a 300°F oven.
Pro Storage Tip: Always store glazed and unglazed donuts separately if possible. The glaze can get sticky and cause donuts to stick together.
FAQ
Q: Can I use instant yeast instead of active dry?
Yes! Use the same amount (2¼ tsp). You don’t need to activate it first — just add it directly to the flour. Your rise times may be slightly shorter, so keep an eye on the dough.
Q: My donuts are coming out dense. What went wrong?
Most likely one of two things: the yeast wasn’t properly activated (check the water temperature), or the donuts didn’t get enough time on the second rise. Both are easy to fix next time.
Q: What oil is best for frying?
Anything with a high smoke point and neutral flavor — vegetable, canola, or sunflower oil all work great. Avoid olive oil; the flavor doesn’t work here and the smoke point is too low.
Q: My glaze is too thick or too thin. How do I fix it?
Too thick: add milk, one teaspoon at a time, and whisk. Too thin: add more sifted powdered sugar, a tablespoon at a time. It takes about 30 seconds to adjust once you get the hang of it.
Q: Can I make these without a stand mixer?
100%. It just takes more elbow grease. Knead the dough by hand for about 10 minutes on a lightly floured surface until it’s smooth and elastic. It’s actually kind of therapeutic once you get into it.
Q: Can I bake these instead of frying?
Yes. Bake at 375°F (190°C) for 10–12 minutes in a greased donut pan. The texture will be more cake-like and less rich, but still genuinely delicious with the chocolate glaze on top.
Q: Why does my glaze not look glossy?
It’s usually because the donuts were too cool when glazed. Dip them while they’re still slightly warm for that glossy, set finish. Also make sure your powdered sugar is properly sifted — lumps kill the glossiness.
Q: Do I really need a candy thermometer?
For best results, yes. You can test with a wooden spoon — if tiny bubbles form steadily around it, the oil is roughly at temperature. But a thermometer takes the guesswork out completely and makes a real difference in the final texture.
Wrapping Up
Look, I’m not saying these homemade chocolate donuts will change your life. But they might change your Sunday mornings.
Once you pull that first golden donut out of the oil and dip it into the chocolate glaze — and watch that glaze set into a perfect, glossy shell — you’ll get it.
It’s one of those recipes you’ll find yourself coming back to again and again. Not because it’s complicated, but because it’s that good.
Give them a try this weekend, then come back and drop a comment below. I’d genuinely love to know how they turned out — and if you added any fun toppings, definitely share that too.
Any questions along the way? Leave them below and I’ll do my best to help. 👇