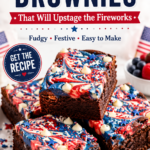
One bowl. No mixer. A result so good you’ll hide them from your family.
You’ve had brownies before. But have you had these brownies?
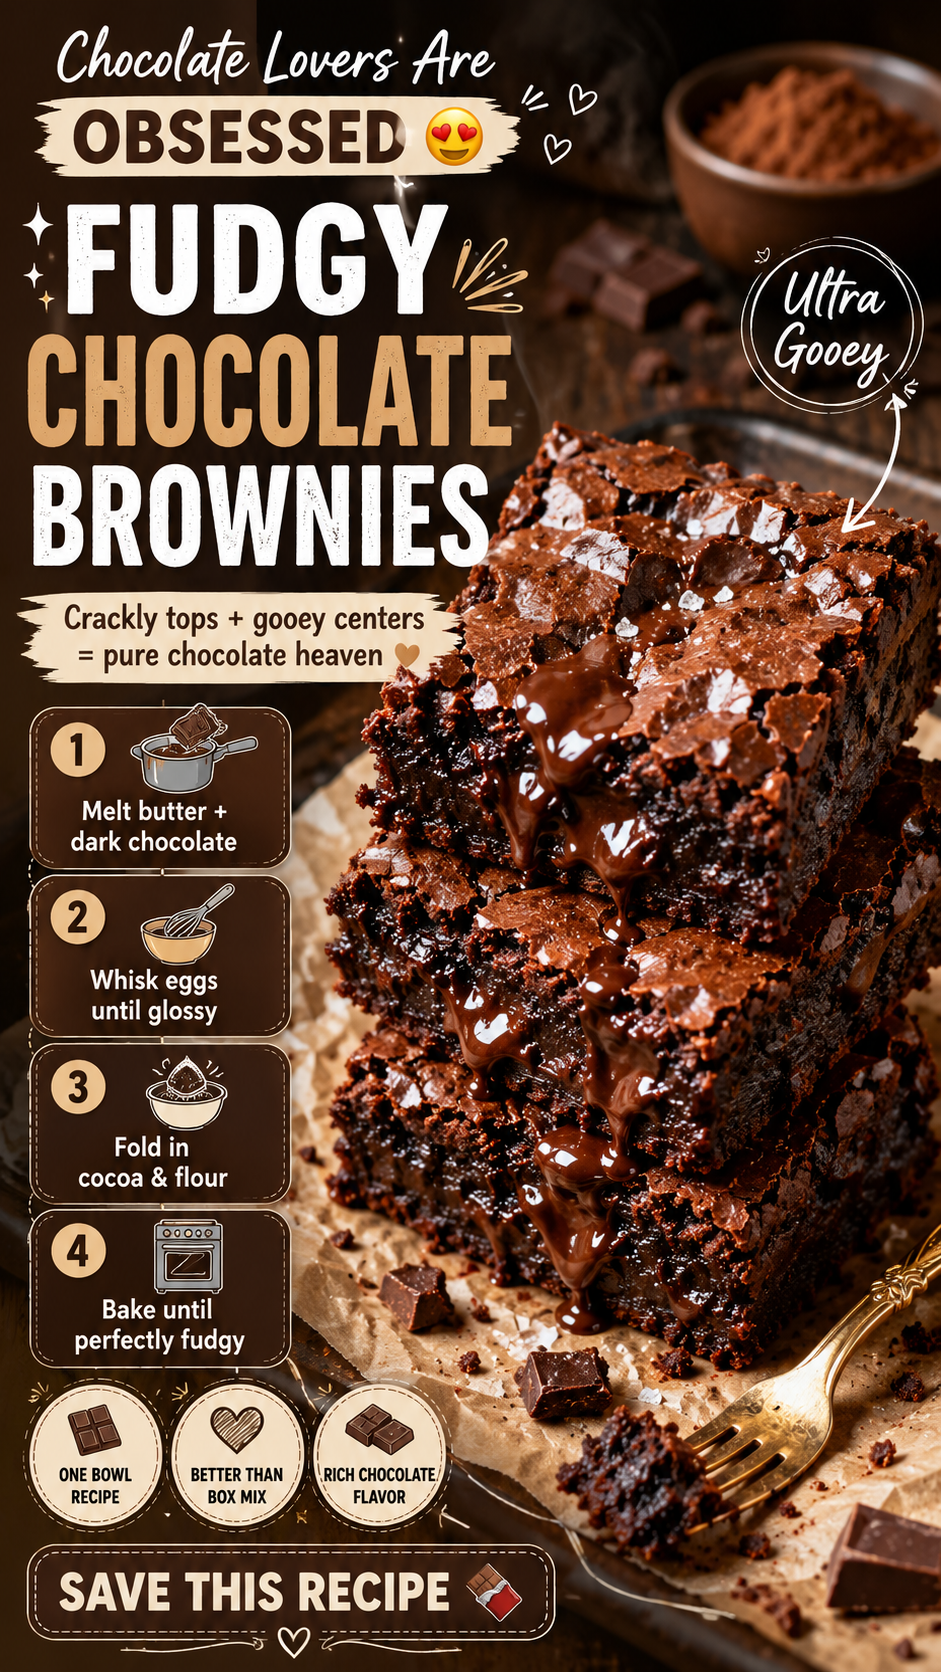
I’m talking crinkle-top, dense-in-the-middle, pull-apart fudgy brownies that taste like a chocolate truffle and a brownie had a baby. Not cakey. Not dry. Not the kind you make from a box and feel mildly disappointed by.
The kind that make people text you asking for the recipe. 😍
What’s wild is how simple they are. One bowl, a whisk, and about 40 minutes of your life. That’s it. Stick with me because there’s a trick in the middle of this post that completely changes the texture — and most people skip it.
Recipe at a Glance
| Detail | Info |
|---|---|
| Prep Time | 10 minutes |
| Cook Time | 25-28 minutes |
| Total Time | ~40 minutes |
| Serves | 16 squares |
| Difficulty | Easy |
| Bake Temp | 325°F / 165°C |
Why These Brownies Hit Different
Most brownie recipes use cocoa powder as the only chocolate source. These use melted dark chocolate AND cocoa powder together. That double hit of chocolate is what gives them that deep, almost bitter-sweet edge that keeps you going back for more.
Also — and this is the part people don’t talk about enough — brown butter. You melt the butter until it’s nutty and golden before mixing anything else in. It adds this subtle caramel-like depth that you can’t quite put your finger on, but you’d definitely notice if it wasn’t there.
Fact: The iconic shiny, crinkled top on fudgy brownies comes from vigorously whisking the eggs and sugar together until the mixture turns pale and ribbon-like. That step dissolves the sugar into the eggs and creates a thin, crispy layer on top as it bakes. Skip it and your brownies will still taste great, but that beautiful crinkle? Gone.
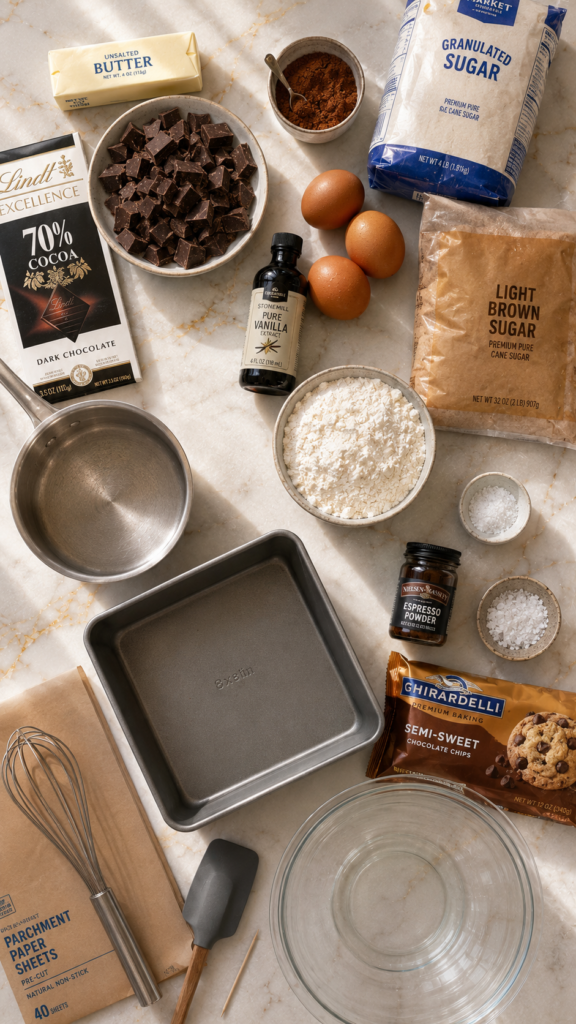
What You’ll Need
The Chocolate Base
- 115g (½ cup) unsalted butter
- 170g (6 oz) dark chocolate, roughly chopped (70% cocoa or higher)
- 50g (½ cup) unsweetened cocoa powder, sifted
The Sweet & Rich Layer
- 200g (1 cup) granulated white sugar
- 100g (½ cup packed) light brown sugar
- 3 large eggs, room temperature
- 2 teaspoons pure vanilla extract
The Dry Mix
- 95g (¾ cup) all-purpose flour
- ½ teaspoon fine sea salt
- ½ teaspoon espresso powder (optional but highly recommended — it amplifies the chocolate flavor without making them taste like coffee)
Optional Add-ins
- 85g (½ cup) semi-sweet chocolate chips folded in at the end
- Flaky sea salt for topping
Tools You’ll Need
- 8×8 inch (20×20 cm) metal baking pan — metal conducts heat better than glass for a fudgier result
- Medium saucepan (for browning the butter)
- Large mixing bowl
- Whisk
- Rubber spatula
- Parchment paper
- Fine mesh sieve or sifter (for the cocoa powder and flour)
- Toothpick or skewer (for testing doneness)
Pro Tips
- Don’t overbake. Pull them out when a toothpick inserted in the center comes out with a few moist crumbs — not completely clean. They firm up as they cool. Overbaked brownies are cakey brownies, and nobody came here for that.
- Use room temperature eggs. Cold eggs can cause the melted chocolate mixture to seize up or turn grainy. Set them out 30 minutes before you start.
- Whisk the eggs and sugar hard. This is the crinkle-top secret. Whisk for a full 2–3 minutes until the mixture looks pale and thick. Your arm might complain. It’s worth it.
- Let them cool completely before cutting. I know. It’s excruciating. But cutting warm brownies gives you a crumbly mess instead of clean, fudgy squares. 1 hour minimum — or pop them in the fridge for 30 minutes.
- Chop your chocolate small. Smaller pieces melt more evenly into the hot butter, which means no seized chocolate and a smoother batter overall.
How to Make Fudgy Chocolate Brownies
Step 1:
Preheat your oven to325°F (165°C): Line your 8×8 inch pan with parchment paper, leaving some overhang on two sides so you can lift them out easily later. Lightly grease the parchment.
Step 2:
Place the butter in a medium saucepan over medium heat: Let it melt fully, then continue cooking, stirring occasionally, until it turns golden and smells nutty— about 3–4 minutes. Watch it closely; it goes from perfect to burned fast. Pour the brown butter into your large mixing bowl immediately.
Step 3:
Add the chopped dark chocolate to the hot brown butter and stir until completely melted and smooth. Let it cool for 5 minutes before the next step.
Step 4:
Add both sugars to the chocolate mixture: Whisk vigorously for 2–3 minutes until the mixture looks slightly thickened and glossy. This step is non-negotiable if you want that crinkle top.
Step 5:
Add the eggs one at a time, whisking well after each: Mix in the vanilla extract.
Step 6:
Sift in the cocoa powder, flour, salt, and espresso powder (if using): Switch to your rubber spatula and fold gently — mix just until no dry streaks remain.Don’t overmix.
Step 7:
Fold in chocolate chips if using. Pour the batter into your prepared pan and spread evenly. Sprinkle with flaky sea salt if desired.
Step 8:
Bake for 25–28 minutes. Start checking at 23 minutes. The edges should look set and the center should have a very slight jiggle. A toothpick should come out with moist crumbs.
Step 9:
Let them cool in the pan on a wire rack for at least 1 hour before lifting out and cutting into 16 squares. For the cleanest cuts, use a sharp knife wiped clean between each slice.
Substitutions and Variations
| Ingredient | Swap For | Notes |
|---|---|---|
| Unsalted butter | Vegan butter or coconut oil | Coconut oil won’t brown the same way but still works well |
| Dark chocolate | Dairy-free chocolate chips | Goes fully vegan when combined with egg substitute |
| Eggs (3 large) | 3 flax eggs (1 tbsp ground flax + 3 tbsp water each) | Less fudgy but still delicious |
| All-purpose flour | 1:1 gluten-free flour blend | Works surprisingly well |
| Granulated sugar | Coconut sugar | Slightly less sweet, more caramel-adjacent |
| Espresso powder | Instant coffee granules (same amount) | Or just skip it entirely |
Fun Variations to Try
- Peanut Butter Swirl: Drop spoonfuls of peanut butter on top of the batter and swirl with a toothpick before baking
- Mint Chocolate: Add ½ teaspoon of peppermint extract with the vanilla
- Nutty Brownies: Fold in ½ cup of roughly chopped walnuts or pecans at the end
- Salted Caramel: Drizzle caramel sauce over the top before baking and finish with flaky salt
Make-Ahead Tips
The batter can be made up to 24 hours in advance and stored covered in the fridge. Just let it come to room temperature for 30 minutes before spreading and baking.
You can also freeze the baked brownies (whole or cut into squares) tightly wrapped for up to 3 months. Thaw overnight in the fridge or at room temperature for a couple of hours.
Nutritional Breakdown
Approximate values per brownie square (based on 16 servings):
| Nutrient | Per Square |
|---|---|
| Calories | ~210 kcal |
| Fat | ~12g |
| Saturated Fat | ~7g |
| Carbohydrates | ~27g |
| Sugar | ~20g |
| Protein | ~3g |
| Fiber | ~1.5g |
Note: Values are estimates and will vary depending on the exact chocolate used and any add-ins.
Meal Pairing Suggestions
- A scoop of vanilla bean ice cream — the contrast of cold and warm is unbeatable
- Fresh raspberries or strawberries cut right through the richness
- A hot cup of espresso or strong coffee — it’s a whole experience
- Dollop of lightly sweetened whipped cream if you want to feel fancy
Leftovers and Storage
Room temperature: Store in an airtight container for up to 4 days. Put a piece of bread in the container — it absorbs moisture and keeps brownies soft. Yes, this actually works.
Fridge: Up to 1 week. They get even fudgier when chilled, which some people (me) prefer.
Freezer: Wrap individual squares in plastic wrap and freeze in a zip-lock bag for up to 3 months.
FAQ
Why are my brownies cakey instead of fudgy?
Three common reasons: too much flour, too many eggs, or overbaking. This recipe uses less flour than most and relies on melted chocolate rather than just cocoa powder for that dense, fudgy texture. Also — check your oven temperature with a thermometer if you keep getting cakey brownies. Most ovens run hot.
Can I use milk chocolate instead of dark chocolate?
You can, but the brownies will be noticeably sweeter and less intense. If you go that route, reduce the granulated sugar by about 25g to compensate.
Why did my chocolate seize when I added it to the butter?
This can happen if the butter was too hot when the chocolate went in, or if any water got into the mixture. Let the brown butter cool for a couple of minutes before adding the chocolate, and make sure your bowl and utensils are completely dry.
Do I really need the espresso powder?
Nope. But it’s one of those quiet ingredients that does a lot of heavy lifting. You won’t taste coffee — you’ll just taste more chocolate. It’s worth having a small jar on hand if you bake often.
Can I double this recipe?
Yes! Use a 9×13 inch pan and add about 8–10 extra minutes to the baking time. Start checking for doneness at 30 minutes.
My brownies look underdone when I pull them out. Is that okay?
Completely normal. The center will firm up as they cool. A toothpick with a few moist crumbs means they’re done. A completely clean toothpick means they’re overbaked. Trust the process.
Wrapping Up
This recipe is the kind you’ll make once and then make on repeat. One bowl, simple ingredients, and a result that genuinely impresses every single time.
Once you try the brown butter version, you’ll never go back to plain melted butter again. That’s just a fact. 😄
Give these a go and drop a comment below — I want to know how they turned out for you. Did you add the sea salt on top? Did you manage to wait a full hour before cutting in? Any questions at all, leave them below and I’ll answer every one.